If you’ve spent any time on our blog lately you already know how we feel about the AeroPress: it’s a truly fantastic coffee maker.
It’s capable of everything from regular coffee brewed exactly to your discerning tastes, to cold brew coffee and even coffee that rivals what an authentic espresso machine can produce.
What an AeroPress can do with a few grams of ground coffee beans, some hot water and a cup—even on the go—is really something to be valued. And it doesn’t stop there.
Using a more concentrated coffee blend and adding some steamed milk or milk from a milk frother, we’re going to brew a cup of coffee befitting museum-quality latte art.
This article will explain the process of brewing your own latte in the AeroPress. We’ll go over the ingredients, brew ratio, and key tips to get it right.
After reading this article, you’ll know how to make AeroPress latte on your own.
Let’s jump in!

Can You Really Make a Latte With an AeroPress?
Believe it or not, you absolutely can. The AeroPress is already capable of producing a brew with the strong coffee taste most people only attribute to coffee from an espresso machine.

Because it’s so versatile and allows for such a high degree of control over different brewing variables most other coffee makers don’t, in combination with its modified immersion brewing method, a great latte is totally achievable with your AeroPress.
In fact, you can even make yourself an iced latte using the device, as it’s a great option for cold brew as well.
How to Make AeroPress Latte
Some Tips on Brewing Great AeroPress Coffee
To make your AeroPress coffee, we highly recommend using two rinsed filter papers.
This is to ensure the coffee grounds are completely saturated any coffee makes its way into your cup.

A note on coffee extraction
In general it’s worth putting in the extra effort to avoid under-extracted coffee, which is what you get when either brew time is too short, water isn’t hot enough, or steeping time isn’t enough.
Any of those factors in combination increase your chances of getting under-extracted coffee, which you may notice tends to taste sour (it’s more acidic than it should be) and weak.
Because the key (or one of two keys, anyway) to a quality AeroPress latte is first brewing a somewhat more concentrated coffee that’s heavy on that strong roasted coffee flavor, making sure you get a good coffee extraction is critical.
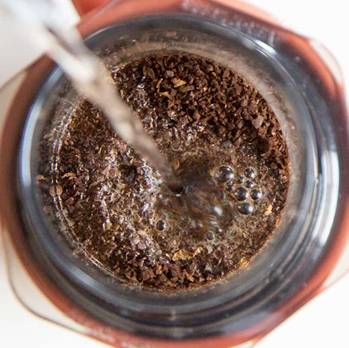
Once the paper filters have been soaked and your coffee has been measured out and placed inside, add your water to the AeroPress.
Set a timer for 1 minute 30 seconds and stir the coffee for at least 10 seconds to ensure a thorough extraction.
AeroPress Latte Instructions
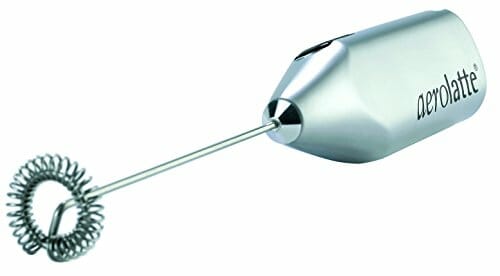
Milk steamer or frother
For coffee lovers who are looking for a less expensive alternative to pricey Starbucks drinks, we’ve got some delightfully simple instructions for making AeroPress latte at home.
To get a true latte though, you’ll need either a milk steamer or a milk frother.

Without either you may be able to get a flavor that’s somewhat close to what you might expect of a latte, but the texture will fall short.
For the majority of people, a milk frother may be more attainable, so we’ll assume you’re using that.
Latte steps
First, you should brew your AeroPress coffee per our guidelines above.

Next, warm your milk, then place the foaming wands of your milk frother into the milk, dipping them just below the surface.
After a few minutes, you can pour your AeroPress coffee into the frothed milk. Once the foam is done, pour the coffee slowly and heap it on top.
To get that perfect foam latte art that so many coffee lovers crave, you can use a fancy coffee stencil for your frothed or steamed milk pour.
Finally, add any syrup or sugar you like. The foam will form on top of the coffee, which will make your latte look great!
Pour your AeroPress latte into a glass and add garnishes if desired.

Iced latte hack
If you don’t have a milk steamer or a frother, but you’re a fan of iced coffee, you’re in luck!
The temperature and ice components of iced lattes take most of the attention in terms of body and texture, so you can achieve a delicious latte-like cold brew by adding milk in whatever proportion you like best after brewing a batch of chilled coffee.
For a great guide and some cool insights into AeroPress iced coffee in this recent article.

Ingredients
The basic ingredients of an AeroPress latte are—wait for it—ground coffee beans and milk.
But there are a lot of different ways to customize the flavor and feel of your traditional or iced lattes.
We recommend between 5-8 ounces of steamed milk, and we cover the idea brew ratio just below.
The type of coffee grounds you use, whether you use whole milk, skim milk or barista blend oat milk will all have a significant impact on the outcome of your drink.
You can also add coffee syrups or extracts to your latte to customize it.
Most lattes you’ve had were likely made using an actual espresso machine and steamed milk, but concentrated coffee can provide enough coffee flavor to offset the need for an espresso maker.

We [recently (~) pitted] the AeroPress against an espresso machine and analyzed just how close you can get to those stronger coffee notes (hint: it’s pretty close).
While espresso is typically the preferred choice for a latte, any type of coffee will work as well.
It all comes down to your preferences, which is what makes the AeroPress such a great coffee maker in the first place.
Milk and Non-Dairy Alternatives
To make a perfect AeroPress latte, you need to have a heated milk component.
You can use fresh full-fat milk, oat milk or almond milk. Ideally you should use a milk steamer, but in lieu of a dedicated milk-heating device, you can always microwave it.
You can also aerate the milk using a balloon whisk. After your milk has been heated, add the coffee to it and wait about 30 seconds. Then froth the milk.
Coffee Grounds to Water Ratio
When brewing any type of coffee in an AeroPress, the amount of water to coffee grinds is crucial to ensuring the perfect cup of java.
The brew ratio determines the strength of your drink, and too much or too little coffee can leave you with either a weak or bitter brew in your coffee cup.

As a general rule, the brew ratio for a latte is fourteen to sixteen grams of dry coffee per 250 grams of water (1:15 ratio). Experiment with the ratio as you dial your brew in to find the best taste and strength.
Measuring Tip
We recommend trading your plastic coffee scoop for an electronic kitchen scale to really nail down the exact coffee ratio that works best for you.
Concentrated coffee is good in this case, but too much coffee to water risks under-extraction.
Pros of AeroPress Latte vs. Espresso Machine Lattes
Cost, Convenience and Customization
The traditional latte can be made with a single or double shot of espresso and flavored with syrup or sugar.
In a coffee shop setting, after the coffee has been brewed, it’s added to 5-8 ounces of steamed milk.
This frothed milk gives the drink its distinct thick, milky taste.
On the downside, you can probably buy yourself an AeroPress if you saved what you would otherwise spend on a handful of professionally-brewed coffee shop lattes.
The AeroPress costs is only about $25, but purchasing a decent espresso machine will set you back $200 or more. Is it worth the money?
Using a slightly more concentrated coffee blend in your AeroPress is an excellent way to achieve coffee similar enough to espresso for use in both hot and iced lattes.
In addition, the coffee made with AeroPress is much more rich and flavorful than a conventional coffee maker.
Its filtration system forces the coffee through a fine mesh and is capable of passing through natural oils (if using a metal filter) to produce a richer shot.
The coffee is far less acidic, and the AeroPress recipe is close to a true espresso.
Where the AeroPress flat out wins over an espresso maker is in executing your favorite iced latte recipe, which the latter simply cannot do.
Cons of Using an AeroPress for Your Lattes
We’d argue the downsides are heavily outweighed by the positives, but for balance let’s explore what you lose by not using an actual espresso machine:
While the AeroPress can brew an excellent cup of concentrated coffee that to many coffee aficionados would easily rival the flavor of genuine espresso, the AeroPress takes a bit more effort to use repeatedly.
Even though an espresso maker needs constant cleaning, it can make a latte with very little effort or involvement from the user.
The AeroPress requires you to pre-grind your coffee beans (we highly recommend using a burr grinder for optimal grind size), while an espresso machine can accept whole beans.
With an AeroPress, you need to make your own milk foam with a separate device or heat your milk on the stove or in the microwave.
Wrap-Up: Getting a Latte From Your AeroPress
With this guide and the related articles we’ve linked to within it, you should have everything you need to brew a fantastic AeroPress latte.
The AeroPress is by now a tried-and-true method for making even the most elaborate, unique coffee variants, and our own personal experience proves it’s no different when it comes to making a great latte.
Further reading: How to brew Aeropress Vietnamese coffee

