Breville is many coffee lovers’ go-to brand for top-quality coffee gear to brew professional-level cups of Joe, especially when it comes to its lineup of espresso machines.
But for beginners, it’s hard to figure out how to use an espresso machine by sight
In this article, I will show you how to use a Breville espresso machine, from the initial setup, what beans to use, to step-by-step brewing instructions, and a helpful troubleshooting section to boot.
Types Of Breville Espresso Machines
Currently, the brand is offering 11 different high-quality Breville espresso machines.
All of them are engineered with the signature 4 keys formula that optimizes critical aspects of the brewing process to enable users to achieve third-wave specialty coffee at home:
- Rich and full flavor with a precise freshly ground coffee dose of 18 – 22 g.
- Irresistible body with low-pressure pre-infusion technology and ideally high 9-bar pressure applied on the extraction process.
- Perfectly balanced taste with state-of-the-art digital temperature control (PID) technology to precisely adjust and maintain the water temperature (around 93 degrees Celsius/199 degrees Fahrenheit).
- Silky and velvety mouthfeel with a quality steam wand using appropriate pressure and correct temperature to create excellent micro-foam milk.
Among the Breville espresso machines lineup, some are fully automatic which can almost carry out the entire brewing process seamlessly with minimal effort from the user.
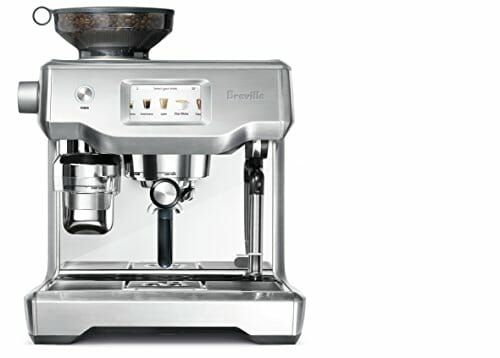
The new generation automatic Breville espresso machines are also accompanied by an intuitive touchscreen on which the user simply swipes and selects their favorite coffee options to direct the machines on how they want their espresso drinks done.
The best Breville espresso machine that fits this description is the Breville Oracle Touch.
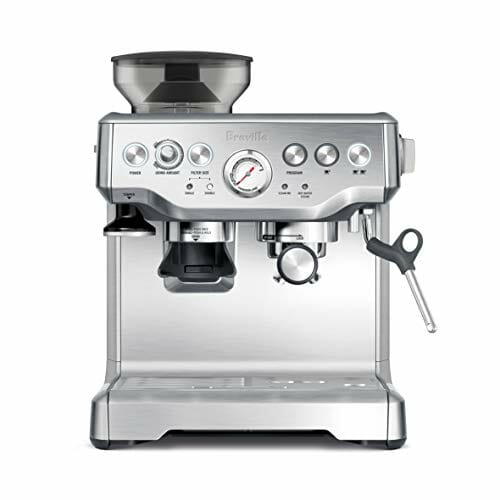
For home baristas who want more hands-on control, a manual (semi-automatic) espresso machine like the Breville Barista Express gives the user more freedom and control over how the espresso shot is pulled, from grinding coffee beans, making espresso, to texturing milk.
You get to experience a more distinct learning curve and feel like a real pro barista.
For the sake of meaningful learning, the following guide to using a Breville espresso machine will be demonstrated with the Breville Barista Express, a manual device, rather than the newer super-automatic models with which you can basically follow the intuitive instructions on the touchscreen.
This model is also equipped with more functions (like the built-in coffee grinder and steam wand) and can offer a higher-quality coffee brewing and drinking experience than other manual Breville espresso machines.
How Do You Set Up A Breville Coffee Maker?
Before brewing your first espresso, there are a few things you need to do to prepare the espresso machine and clean the dust off both its external and internal components.
You’d be surprised at how much dust has been collected from the manufacturing process to the moment the machine reaches your house.
Espresso Machine Preparation
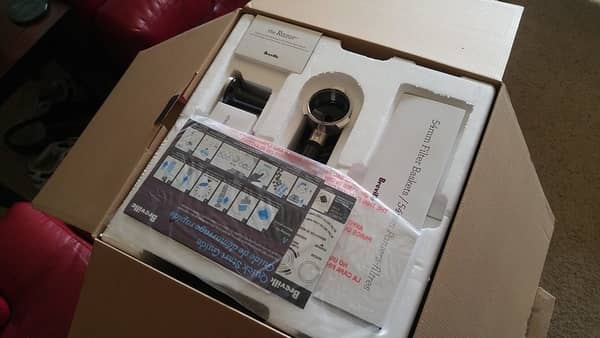
- Open the box and remove all of the espresso machine parts and accessories out of the packaging.
- Discard the labeling and packaging materials.
- Wash the water tank, portafilter, filter baskets, and jug with warm water and a gentle dishwashing liquid. Remember to rinse well.
- Use a soft damp cloth to wipe the outer housing, bean hopper, and drip tray.
- Let everything dry thoroughly before assembling them back together.
Water Filter Insertion
Using regular tap water is fine. But if it tastes or smells off, that can transfer into the final cup of coffee.
What’s more, the harder the water in your area is, the more limescale is built up over time, which can negatively affect the coffee taste, the extraction process, and the operation of the internal components of the espresso machine.
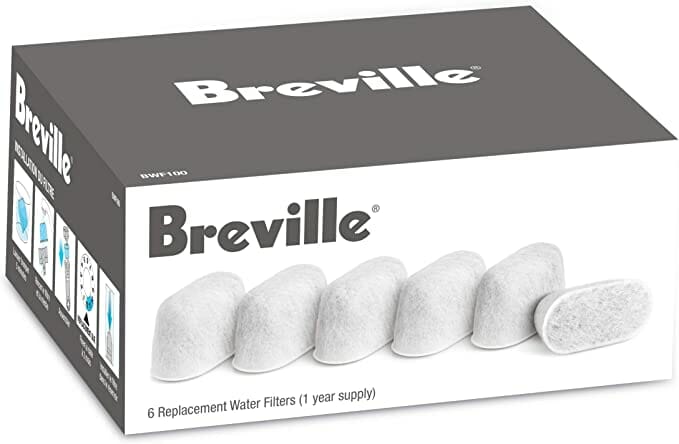
So you should either set up an under-the-counter water filtration, use bottled or spring water, or insert a charcoal water filter into the water tank.
This can help significantly decrease limescale build-ups, which can, in turn, improve the quality of your coffee brew, protect your espresso machine, and reduce the need for descaling.
The Breville Barista Express and other Breville models come with a charcoal water filter that can easily be inserted into the water tank to enhance the water quality with little hassle. Here’s how:
- Soak the charcoal water filter that comes with the espresso machine into a cup of water for 5 minutes.
- Rinse the filter under cold running water.
- Wash the stainless steel mesh in the plastic filter compartment using cold water.
- Insert the filter into the water filter holder.
- Set the dial date 2 months ahead, which is when you should replace the water filter.
- Push down the filter to lock it into place.
- Slide the water tank back into position and lock it into place.
First Flush
Now that the external parts are clean and the water issue is taken care of, you need to run the first brew cycle without any ground coffee to clean the inside before getting on with the first cup.
- Fill the removable water tank with water.
- Plug the Breville Barista Express in.
- Press the POWER button and wait for the machine to go into STANDBY mode once the optimal operating temperature is reached.
- Press the 2 CUP button which should run hot water through the group head for half a minute.
- Activate steam for 10 seconds.
- Repeat the above 2 steps until the water in the tank runs out.
How To Use The Breville Barista Express
Ground Coffee Preparation
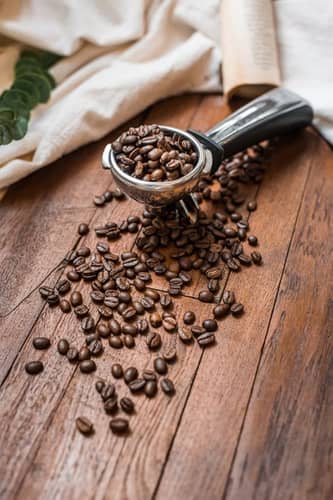
You can use either a traditional blend of both Arabica and Robusta (80-20 or 90-10 ratio) coffee beans for the traditional espresso taste or 100% of the superior Arabica coffee for a perfect cup that’s specialty coffee shop quality.
Type Of Coffee Beans
Play around with blends of a variety of coffee for a balanced and interesting flavor combo or stick to single-origin beans for the ultimate consistent and unique taste.
If you’re having trouble picking out the right bag, find the best espresso coffee beans in the market here, tasting review included.
Roast Profile
The traditional dark roasts are recommended to achieve a richer and fuller-bodied coffee brew with low acidity and a more pronounced layer of perfect crema.
Feel free to experiment with light roasts if that’s your drip. But, for first-time espresso home baristas, I recommend picking the popular option.
Grind Size
Make sure to grind fresh whole coffee beans into finely ground coffee, which is the optimal grind size for brewing espresso drinks. Check the Ultimate Coffee Grind Chart for more information.
Refrain from using pre-ground coffee as it loses freshness a lot faster, which can affect the taste, aroma, and overall quality of the final coffee cup. If you don’t want to drink stale coffee, take my advice.
The Barista Express comes with a built-in grinder, but if your Breville coffee maker doesn’t have one, check out my review on the Breville Smart Pro grinder. A great complement to any Breville espresso machine without a built-in grinder,
Step-By-Step Instructions – How To Dial In Breville Barista Express
Step 1: Fill The Water Tank
- Lift the water reservoir out of place from the back of the machine.
- Check to see whether the water filter is securely fitted.
- Add cold tap water until it reaches the maximum mark which can be observed from the side of the reservoir.
- Slide the tank back into position.
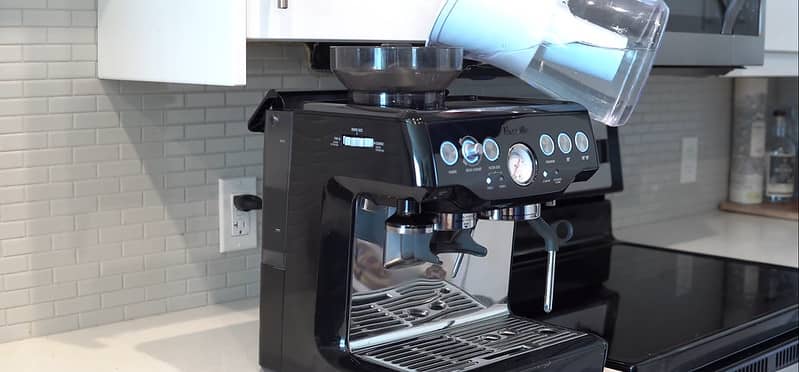
Breville recommends changing the water daily to get the freshest quality possible.
On a more serious note, de-mineralized and distilled water are absolute no-nos as they can cause corrosion. And do not operate the machine without any water inside.
Step 2: Preheat The Machine & The Cup – How Do You Heat A Barista Express?
- Plug the power cord into the outlet.
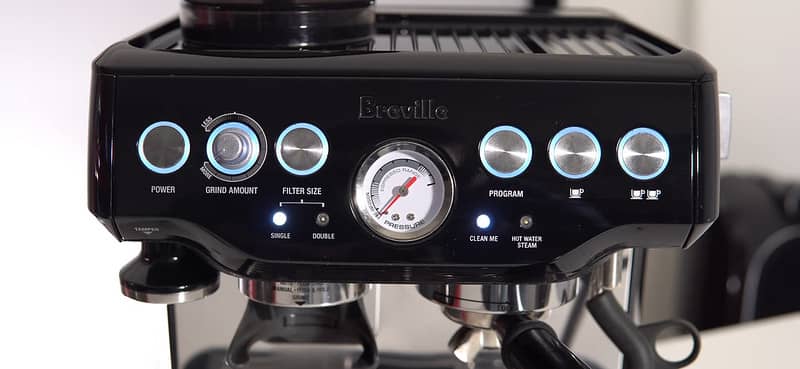
- Press the POWER button, which should prompt it to start flashing.
- Wait for the machine to finish heating up which can take a few minutes. Once it’s reached the ideal brewing temperature, all of the buttons on the control panel will illuminate.
- Add hot water to your serving cup and let it preheat for around 1 minute before discarding the water.
- Place the cup on the warming tray.
Step 3: Set The Grind Setting
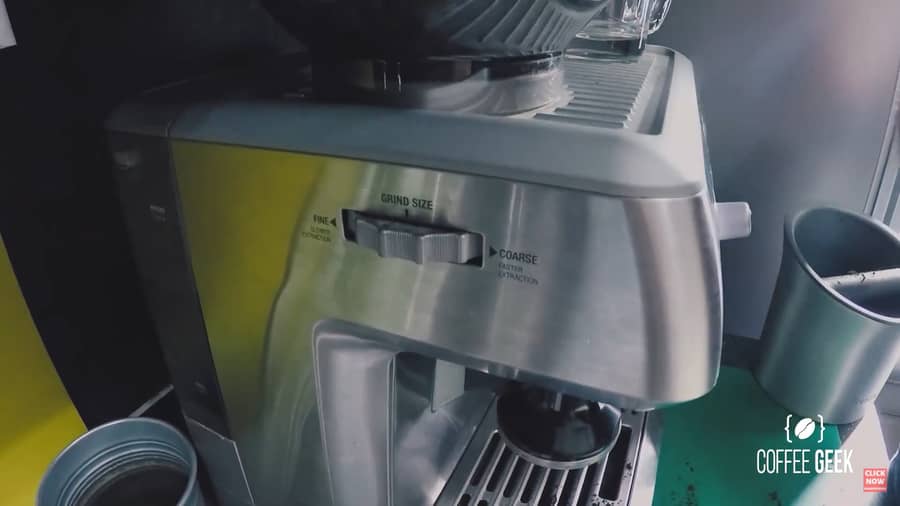
The Barista Express has 18 different grind settings. Breville recommends starting with No. 5 and adjusting it from there per your personal preference.
Pick a smaller number for finer ground coffee if you prefer a stronger brew. Pick a larger number for coarser ground coffee if you’d like your coffee more diluted.
This Breville machine comes with both:
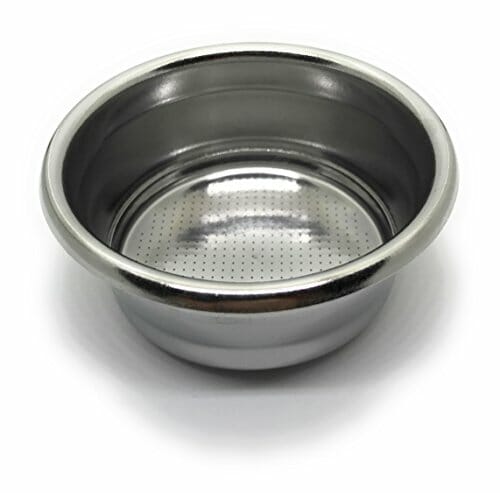
- 1 cup & 2 cup single-wall filter baskets and
- 1 cup & 2 cup dual-wall filter baskets
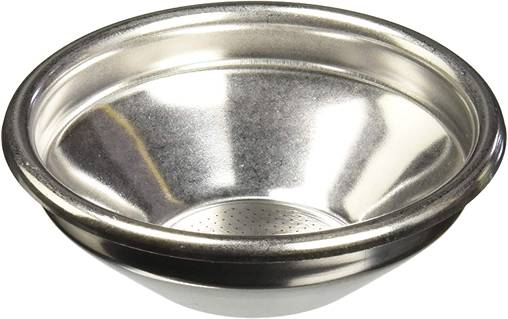
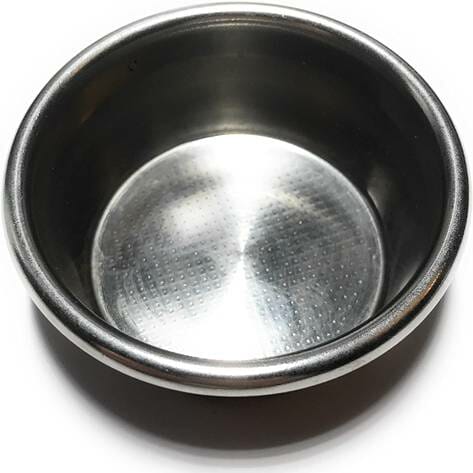
1-cup and 2-cup indicate the number of shots the filter basket is able to pull. Other than the difference in the amount of ground coffee they each can carry, the filter baskets are shaped differently as well, which can affect the espresso extraction. So you also need to keep this in mind when adjusting the grind size.
In particular, the 1-cup (single) basket has a more visible cone shape with a slanted wall, which can better channel the water flow towards the center.
This, in turn, increases the pressure of water on the freshly ground beans puck. So you may need a slightly coarser grind size.
Generally, the 2-cup (double) filter basket is easier to use.
In terms of “single-wall” and “dual-wall”, they refer to the number of walls the filter basket is characterized with.
A single-wall one, or non-pressurized basket, is designed with a typical mesh base with many small holes to hold back the coffee grounds while allowing the hot water to flow through for an even, consistent, and correct extraction.
A dual-wall filter basket, or a pressurized basket, contains another wall that has one small hole at the bottom. This added wall creates more pressure during extraction to improve brew consistency.
It can be especially helpful when brewing with coffee that’s not very well-ground and uniform, such as pre-ground coffee, older beans, or coffee ground by bad grinders (*cough* blade grinders *cough*).
Generally, stick to the single-wall filter baskets that offer more precise control over the extraction, if you don’t have any of the above example issues.
Step 4: Grind Coffee
Make sure the filter and filter holder are dry before attempting. Use a dry cloth to wipe them.
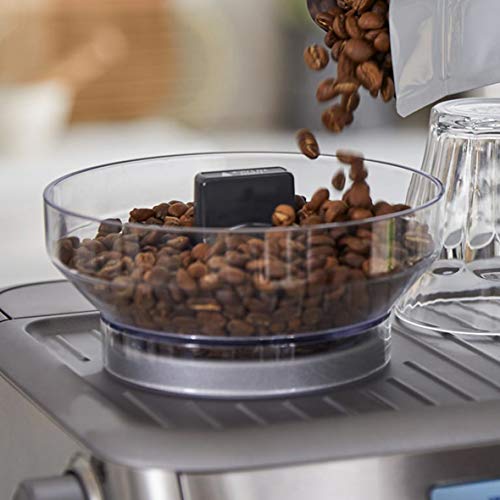
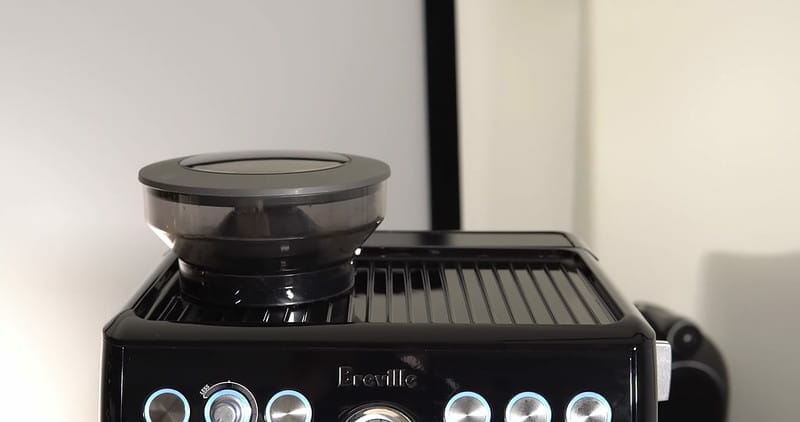
- Add fresh whole bean coffee into the hopper. You need a minimum of 18 g to pull off a double shot of espresso.
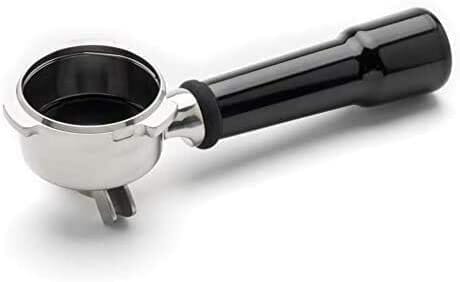
- Insert your coffee filter basket of choice into the portafilter.
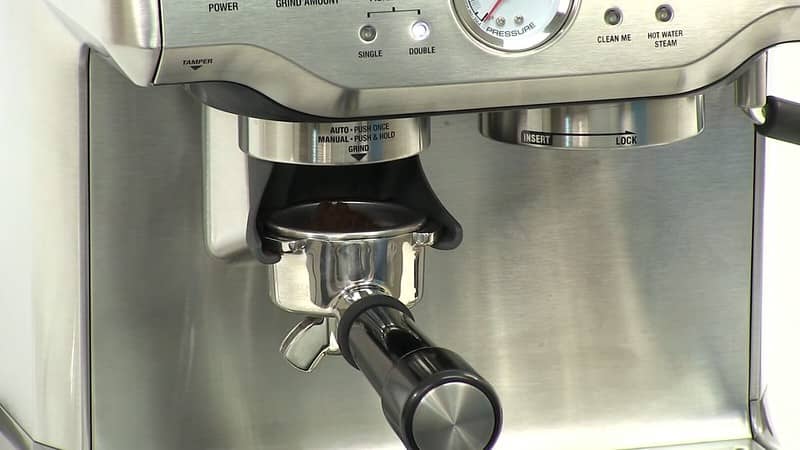
- Place the portafilter into the grinding cradle.
Automatic Dosing
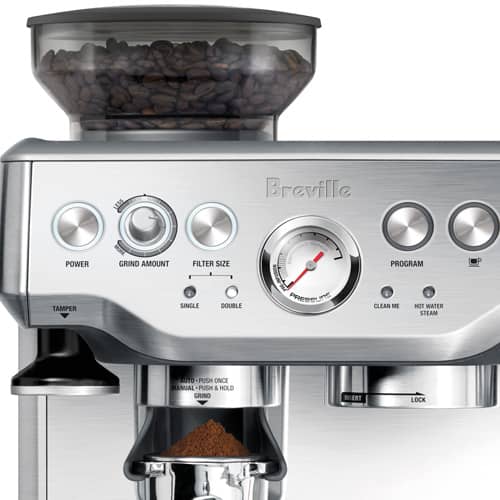
- Pick the filter size depending on which basket you’re using. This will utilize the machine’s automatic dosing feature.
- Push and release the portafilter to start grinding. The machine will dose the correct grind amount.
- Press the filter size button to stop.
Manual Dosing
- Push and hold the micro switch down until the desired grind amount has been dispensed.
- Release the portafilter to stop.
Step 5: Tamp The Ground Coffee
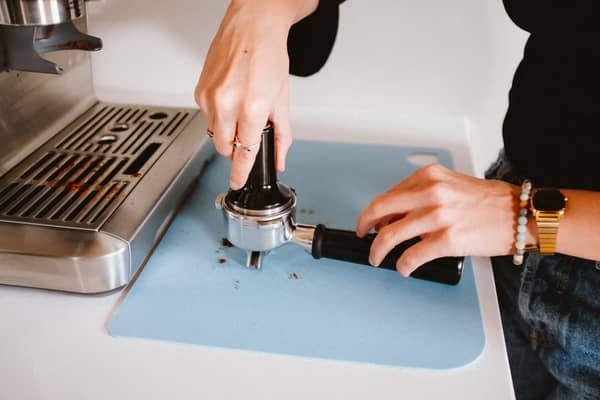
For this section, you may need a tamping mat that can provide extra assistance for a safer, more accurate, higher-quality tamp, even for the pros.
Consider investing in a knock box as well. It’s essentially a trash bin but for ground coffee. This can help you dispose of residual coffee in a more sanitary way and avoid damaging your portafilter. You may also repurpose the discarded grounds for baking, gardening, etc.
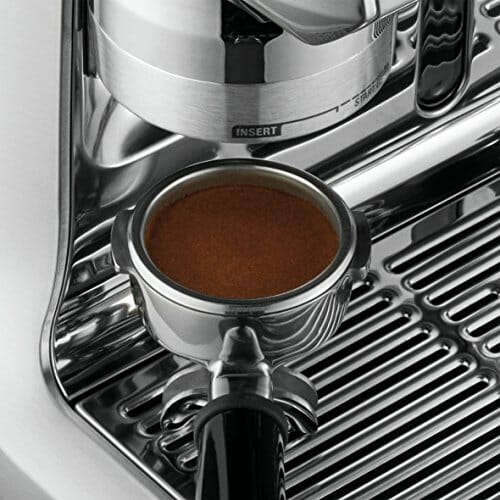
- Carefully withdraw the portafilter from the grinding cradle.
- Lightly tap the portafilter on the counter or the tamping mat to level the grounds.
- Hover it over the knock box and swipe your index finger across the top of the portafilter to get rid of excess grounds.
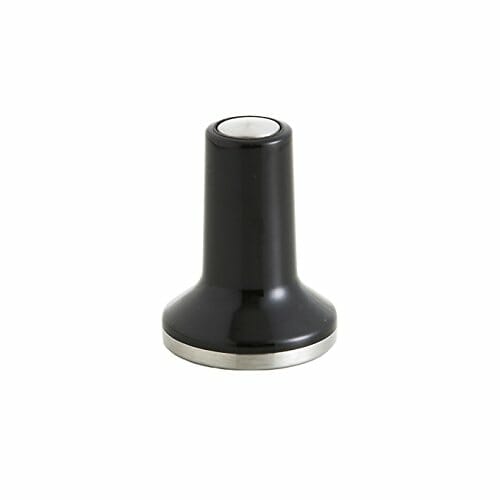
- Place the portafilter on the tamping mat. Grab the integrated tamper and firmly tamp down so that you apply around 15 – 20 kg of tamping pressure.
For more in-depth instructions, check my 5 steps to tamp coffee like a real barista.
Step 6: Trim The Grounds Dose
- Bring the portafilter back above the knock box.
- Insert and fit the Razor – the dose trimming tool – into the filter basket.
- Rotate the tool back and forth to trim off any excess Joe left.
Step 7: Brew Espresso
Pre-programmed shot
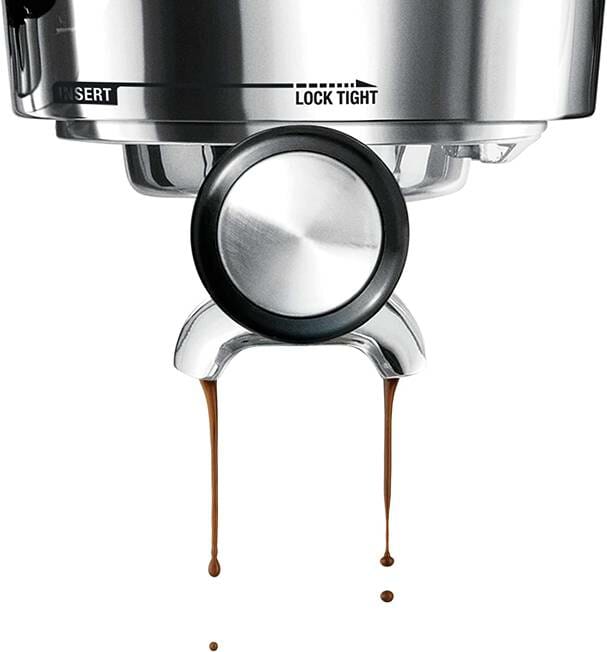
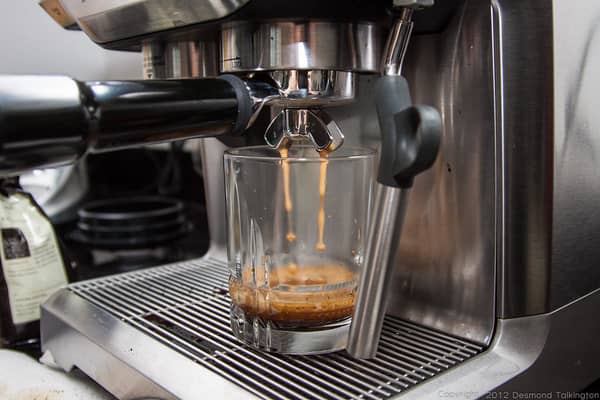
- Insert the portafilter into the group head.
- Place the preheated serving cup below.
- Press either the 1 CUP or 2 CUP button to brew a preset espresso volume (1 oz/30 ml and 2 oz/60ml respectively).
- The cycle will automatically cease once the extraction is finished. If you want to stop mid-way, press either button again.
Manual shot
- Press and hold either the 1 CUP or 2 CUP button to pre-infuse.
- Release the button to apply full pump pressure and start the espresso extraction.
- Press either the 1 CUP or 2 CUP button to stop.
Step 7: Make Steamed Milk – How To Froth Milk With A Breville Espresso Machine
If you want to make a milky espresso-based drink, I recommend using a double shot of espresso as the base rather than a single shot.
- Add milk to the milk jug just below the point where the spout starts, which is roughly half the pitcher.
- Position the tip of the steam wand over the drip tray.
- Turn the STEAM dial to the steam position.
- Wait for the white steam light to stop flashing which means the machine has finished heating up to create steam and the steam wand is ready.
- Return the dial back to the STANDBY position and wait for a few seconds for the steam to pause. This can prevent the milk from splashing out of the stainless steel milk jug during the process.
- Quickly insert the steam wand into the milk but only the steam tip submerges. Hold the handle of the milk jug with your left hand so that the spout faces your right hand.
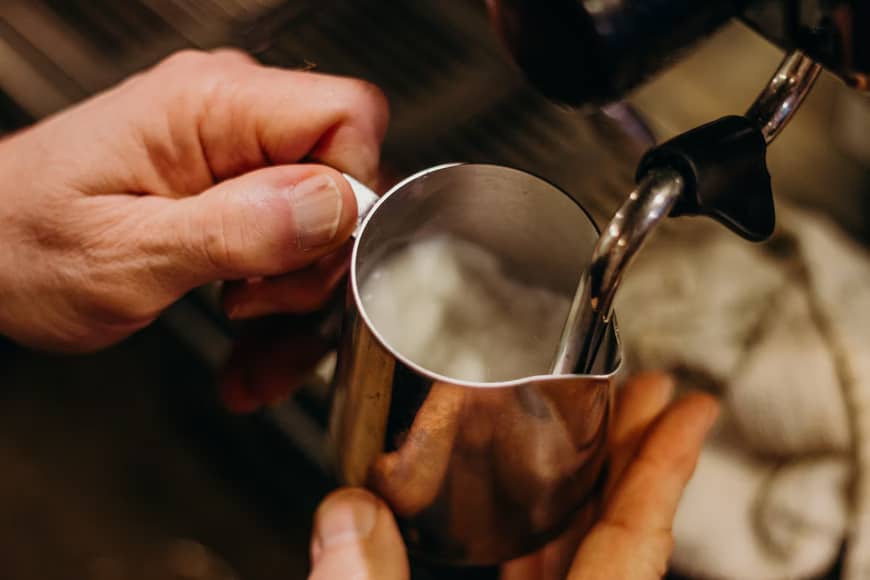
- Turn the steam dial from STANDBY to the STEAM position to start making textured milk.
- While the microfoam is being formed, you can hear a sputtering sound and see a whirlpool effect on the surface of the milk. Once the milk starts spinning, slowly lower the milk pitcher so that the steam tip is only slightly below the surface.
- When the pitcher feels hot to touch, dial back to the STANDBY position and move the pitcher away.
- While holding, gently swirl the jug around. Lightly tap it on the counter to settle the bubbles.
Keep in mind that if your leave the steaming function running continuously for 5 minutes, the machine will automatically disable it and the steam light will flash. If this happens, dial back to the STANDBY position.
Step 8: Add Steamed Milk
- Hold the espresso cup with your left hand and the milk jug with your right hand.
- Slowly pour while swirling half of the milk over the espresso, which should bring the crema on top.
- You can do the same for the rest of it, or make beautiful latte art!
How To Program Breville Espresso Machine
If you don’t like the presets of the default espresso shot, you can program them to your preference. Here’s how:
- Press the PROGRAM button, which will prompt the machine to beep once and flash the program button. This means you’ve entered the programming mode.
- Press either the 1 CUP/2 CUP button (whichever you want to program) to start extracting espresso.
- Press it again once your desired volume has been dispensed. The machine will beep twice and register this as the new pre-programmed setting.
If you want to reset the programmed coffee extraction volumes back to default, press and hold the PROGRAM button until you hear 3 beeping sounds. Release the button and you can expect the original settings to return.
Other Features & Adjustments
Does The Barista Express Dispense Hot Water?
Yes, this Breville model comes with a dedicated hot water dispenser, which can be used for adding hot water into your espresso to make Americano or making other foods and beverages like instant noodles, tea, and hot chocolate.
To use the hot water outlet:
- Place a single cup below the hot water wand.
- Turn the STEAM/HOT WATER dial to the hot water position. The white steam light will flash if the machine needs to heat up. The hot water light will illuminate while the water is dispensed into the cup.
- To stop the flow, turn the dial to the STANDBY position.
Make sure not to use more than 67 oz (2 l) of water each time as the machine is not designed to accommodate large pots.
Within 2 minutes of continuous use, the device will automatically disable it. All you need to do is return the dial to the STANDBY position.
How To Make Breville Espresso Machine Hotter
Since different types of coffee beans may require a different optimal water temperature for the best espresso extraction, this handy machine also allows the user to adjust the temperature in 1 degree Celsius (33.8 degrees Fahrenheit) increments.
Follow the instructions to better accommodate your beans:
- Turn the machine off.
- Press and hold the PROGRAM button and then press the POWER button, prompting the machine to beep once to indicate that you’ve entered the Advanced Temperature setting mode. The illuminated button will display the current temperature.
- Within 5 seconds, press:
- The 1 CUP button to increase the temperature by 1˚C
- The 2 CUP button to increase by 2˚C
- The FILTER button to decrease by 1˚C
- The POWER button to decrease by 2˚C
- The PROGRAM button to return to the default temperature setting
If you don’t press anything within the first 5 seconds, no changes will be made and the device returns to its standby mode.
If you’ve adjusted the temperature to your desired degree, wait for 5 seconds and you’ll hear 2 beeps confirming the changes.
Breville Barista Express Top Burr Adjustment

The Barista Express also allows the user to adjust the top burr of the grinder to achieve a wider grind range when needed.
For example, even though you’ve chosen the finest grind size, the water flow is still too fast, which creates a shot of espresso that’s too diluted for your liking. Or the other way around where the water flow is too slow despite the coarsest grounds size.
This is when adjusting the external grind settings alone is not enough. You need to adjust the internal ones, the top burr, specifically.
- Remove the cover and unlock the hopper.
- Hold the hopper over an air-tight container and turn the dial to lock again to release the unused beans into the container.
- Put the hopper back in place.
- Start grinding until the grinder is completely empty.
- Remove the whole hopper.
- Grab the wire handle and turn the top outer burr counterclockwise. Put enough force into it to make sure it clicks.
- Turn the piece a bit to the left to move the red arrow to the ALIGN position.
- Hold the wire and pull the piece up to remove the top burr.
- Remove the wire handle from both sides of the burr by pulling each side out one by one.
- The red dot, the handle opening, on the top burr is aligned with the number below it, indicating the internal burr grind setting with 6 as the default. To change this, simply rotate the top ring to align the handle opening with your desired number. The bigger the number is, the coarser the size is.
- Insert the wire handle back in place.
- Push the upper burr firmly back into position with the red arrow in the ALIGN position.
- Turn the piece clockwise until it clicks.
- Lay the wire handle flat.
- Reinstall the hopper and lock it before putting the cover on.
How To Clean A Breville Espresso Machine
Like most if not all coffee makers, you need to clean your Breville device regularly. This includes daily maintenance, occasional flushing cycles, and periodic deep-cleaning AKA descaling cycles.
For more details, check out my in-depth articles on how to clean a Breville espresso machine and how to descale a Breville espresso machine.
Breville Espresso Machine Troubleshooting
How Do I Fix The Pressure On My Breville Espresso Machine?
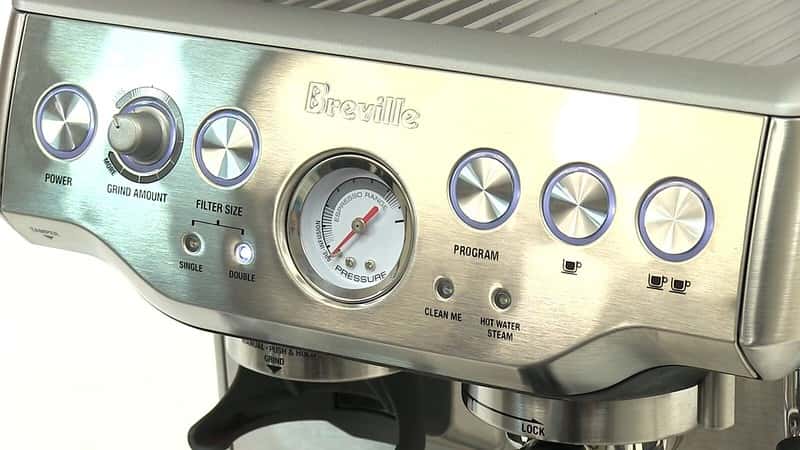
The Breville Barista Express comes with a visible pressure gauge, allowing you to monitor it while brewing to know whether you’ve pulled the perfect shot or not.
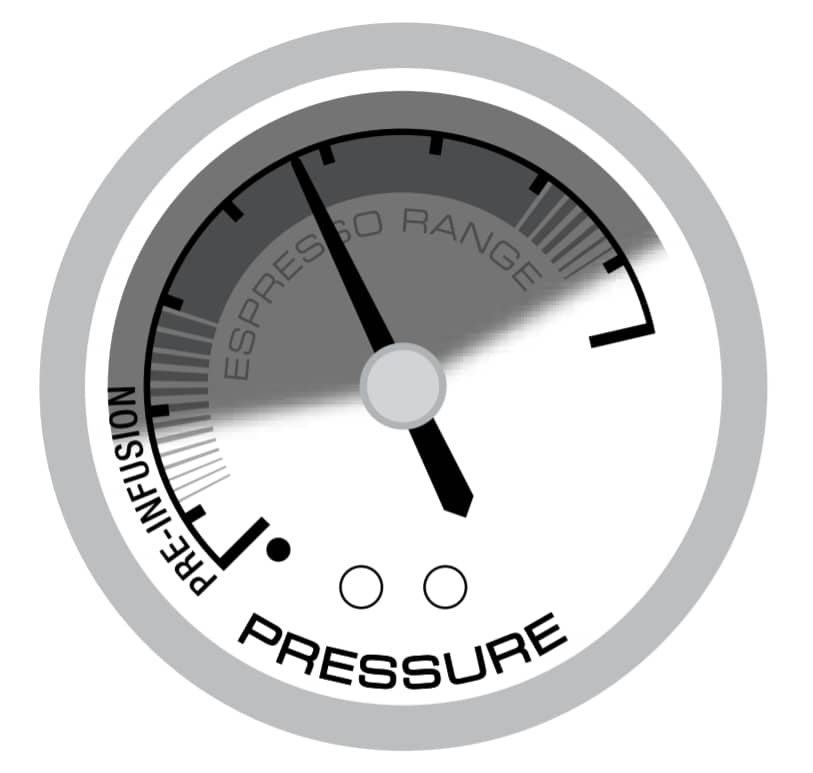
Generally, if the gauge needle is located within the ESPRESSO RANGE, the middle zone during the process, an ideal pressure is being applied, so you can expect an ideal extraction.
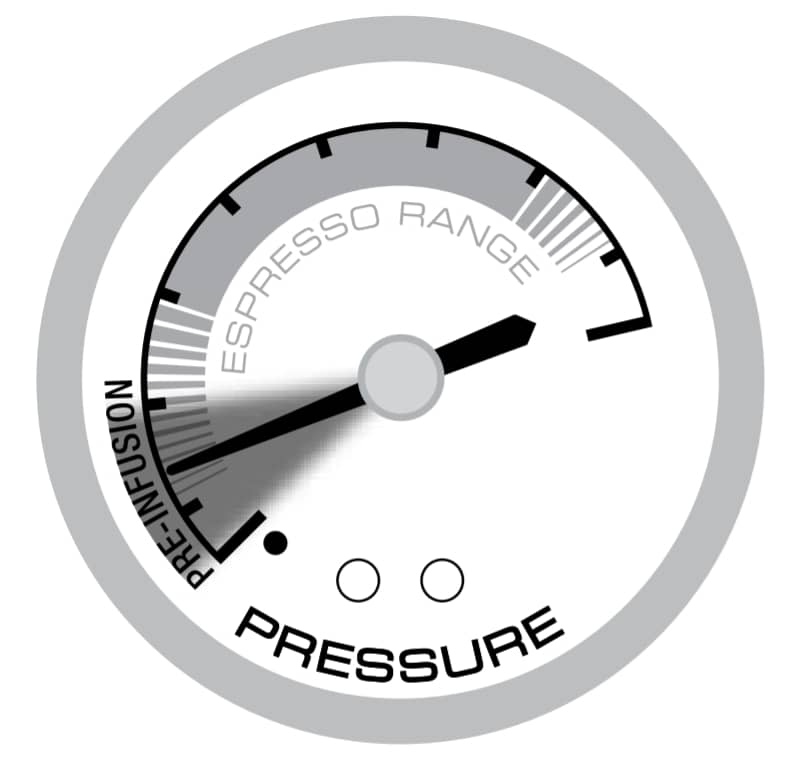
Otherwise, the pressure gauge needle positioning on the lower left indicates insufficient pressure, which means hot water is flowing too quickly through the coffee puck.
This can result in under-extracted espresso that’s diluted and lackluster in taste with a very thin and light layer of crema if there’s any at all.
What causes under-extraction can be attributed to:
- Insufficient grind amount in the portafilter
- Using grounds that are too coarse
- Under tamping the coffee
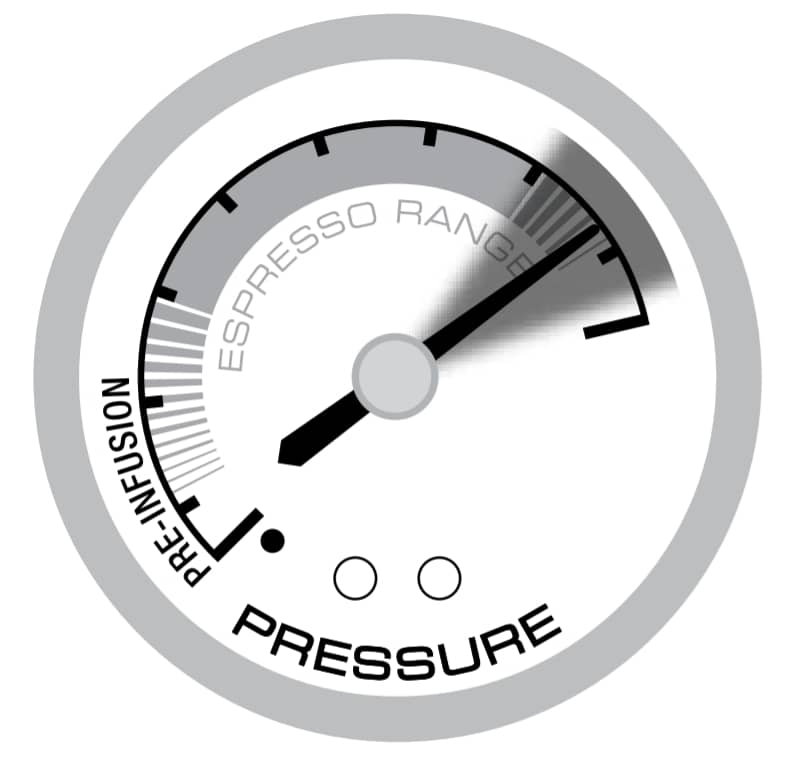
And, if the pressure gauge needle is in the upper right zone, it suggests there’s too much pressure, causing a slower water flow rate. You will end up with over-extracted espresso that’s unpleasantly bitter and dark with a bubbly and uneven crema.
What are the reasons for over-extracted coffee?
- Way more than enough coffee
- Using grounds that are too fine
- Over tamping the coffee
Another general guide to help you assess and achieve the perfect espresso shot is that the coffee should start flowing after around 4 – 8 seconds, which is the amount it takes for infusion.
If coffee comes out within the first 3 seconds, you’ll likely end up with an under-extracted shot. And if it doesn’t flow after 10 seconds, your coffee will eventually come out over-extracted and taste bitter.
Making espresso is a learning curve, so learn from your mistakes and improve in your subsequent shots.
Why Is My Breville Espresso Machine Not Brewing?
Before going the “trouble” route, make sure you’ve plugged the machine in, pressed the POWER button to turn it on, and filled the water reservoir.
If no coffee is coming out still, there may be a blockage in the group head so water is unable to make it through.
This can be attributed to a lack of regular cleaning and descaling, the cleaning and descaling cycles, to be specific.
Other than that, you also use a pin cleaning tool to poke out any blockage in the filter holes. Detailed instructions can be found in the how-to-clean article.
It may also be a grounds size or amount issue. When you:
- Grind the beans too fine
- Add too much coffee
- Tamp the coffee too firmly
The grounds can potentially block up the water flow. Just stop the brew, clean it up, and do it again with appropriate adjustments.
Breville Barista Express Temperature Too Low
Make sure to preheat the cup before brewing to maintain the coffee temperature the moment it flows out. Otherwise, follow my above instructions on how to make the water hotter.
Why Is My Breville Espresso Not Making Crema?
This can be due to:
- Too loosely tamped coffee
- Too coarse grinds
- Poor quality coffee (not fresh)
- Blocked filter holes
Find the right adjustments for the first 3 and clean and descale the machine properly for the last issue (make sure to poke out the blockage with the pin cleaning tool).
Breville Espresso Machine Making Loud Noise
The machine can make a pulsing/pumping sound when extracting espresso or steaming milk, which is a normal function due to the 15 bar pump.
But if it’s continuously making much louder pumping noises, it’s possible that you either:
- Forget to fill the water reservoir
- Place the reservoir not securely
Why Is My Breville Espresso Machine Not Steaming?
Again, make sure the machine is properly turned on and the tank is filled. If not, it may be because:
- The steam dial is not in the STEAM position.
- The steam wand is blocked.
For the second issue, make sure you clean the steam wand properly after each use. Run it clear with steam right after each use. Then let it cool before using a damp cloth to wipe it down. If it’s still blocked, use the cleaning tool to clean the tip or soak it overnight in a cleaning solution.
Why Is My Breville Coffee Grinder Not Working?
If you’ve pressed the microswitch yet the grinder still doesn’t start, the hopper might not be securely in place. Remove it and check for possible debris before properly putting it back in place.
Breville Espresso Machine Stopped Working
If the machine is working for a long time, the pump or grinder may have overheated, prompting the safety thermal-cut to activate. All you have to do is turn the device off and let it rest and cool down for around 30 – 60 minutes.
Breville Espresso Machine Grinder Making Loud Noise
There’s likely a blockage or foreign object stuck in the grinder. You should turn the grinder off immediately and remove the hopper to clear it out. Next time, make sure to check for debris when adding beans to the hopper.
FAQs
How To Reset Breville Barista Express
Sometimes the flow meter of your machine may have some issues, which causes the device to malfunction or not function at all. If descaling doesn’t help with the issue, try resetting it back to the default manufacture settings.
This is essentially an extended version of the resetting instructions I mentioned earlier.
- Press and hold the PROGRAM button until you hear 3 beeping sounds then release.
- Press the POWER button to turn off the machine.
- Unplug it out of the electrical outlet.
- Plug it back in again.
- Turn the machine back on and you’re set.
How Do You Adjust The Grind Size On Breville Barista Express?
There’s a Grind Size Selector gear that can be rotated back and forth to adjust the size of the grounds. As I’ve mentioned, the bigger the number is, the coarser the size will be and vice versa.
Best Settings For A Breville Barista Express
As I’ve mentioned, in the beginning, the best grind setting is No. 5 (or No. 8 in the middle which is a bit coarser) and the best grind amount is the 3 o’clock position on the GRIND AMOUNT position. Feel free to adjust it as you start learning and experimenting.
How To Open A Breville Water Tank
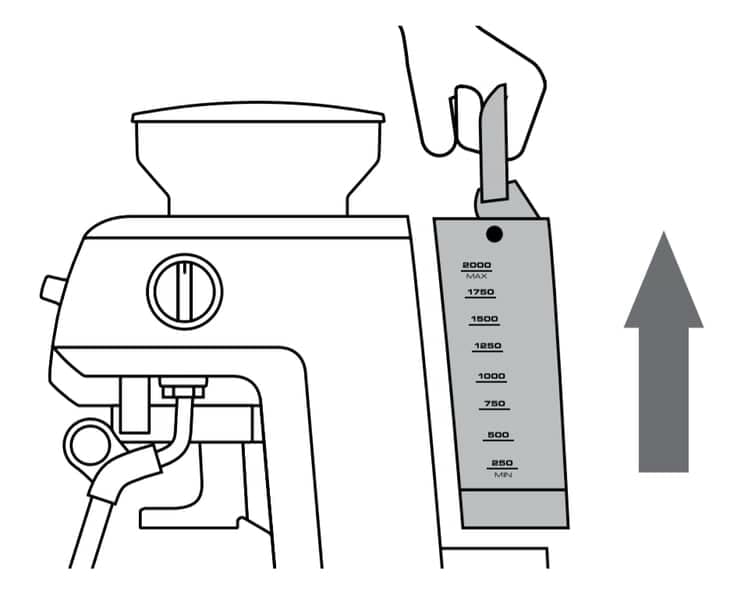
Hold the handle and lift the water tank out of its position, which should open the cover as well. Make sure the water filter is in its place properly and securely before filling the reservoir with water.
How To Unlock Hopper On Breville Coffee Maker
While facing the Barista Express, take out the cover of the hopper and turn the vertical lock 90 degrees counter-clockwise to make it horizontal, which should unlock the hopper from your home espresso machine. Then simply lift it out for cleaning or storage.
How Long Does A Breville Espresso Machine Last?
Depending on how much care and attention you put into keeping the machine in its best shape, which means regular cleaning and descaling when needed, on average, it can last anywhere around 5 and 10 or 15 years.
What Size Is A Breville Portafilter?
Most Breville machines, including the Barista Express, come with a 54 mm stainless steel portafilter. The brand also offers a 58 mm portafilter kit which is compatible with some other models (the Dual Boiler, the Oracle, and the Oracle Touch).

