Keurig coffee makers are renowned for their convenience and ease of use.
However, like any appliance, sometimes you might encounter issues that require resetting or troubleshooting.
If your Keurig is acting up, it might be time to learn how to reset your Keurig to get it back to brewing that perfect cup or amount of coffee.

Understanding your Keurig model is essential to ensure you apply the correct reset technique. How to reset my Keurig?
Some issues might only require basic troubleshooting, such as cleaning the water reservoir or checking for blockages.
On the other hand, more advanced reset techniques may involve pressing certain button combinations or checking the internal components.
It’s always important to consult your user manual for specific instructions tailored to your Keurig model.
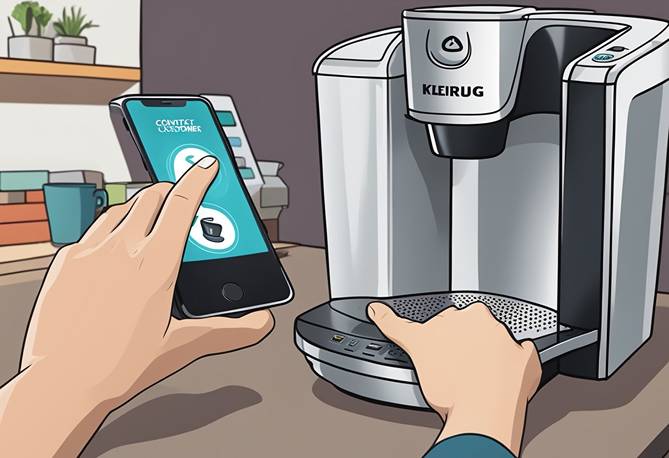
In some cases, if none of the solutions work, reaching out to customer service for further assistance may be necessary.
Keurig customer service can help diagnose any issues and advise whether your coffee maker requires repairs or even replacement.
To help you navigate the process of resetting your Keurig, we have compiled a comprehensive guide covering basic troubleshooting steps, advanced reset techniques, and when to contact customer service.
Key Takeaways
- Identify your Keurig model to apply the correct reset technique
- Start with basic troubleshooting, then move to advanced reset methods if needed
- Contact Keurig customer service if none of the solutions work
Understanding Your Keurig

Different Keurig Models
Keurig offers a variety of models to suit your specific needs and preferences. Some popular models include the K-Classic, K-Duo, Keurig 2.0, Keurig Mini, and K-Supreme.
Each model comes with its own set of features, such as different brewing sizes, hot water functionalities, and more.
Understanding the differences between these models will help you in resetting and maintaining your Keurig machine.
Key Components and Functions
Here’s a quick overview of crucial parts in most Keurig models and their main functions:
- Needle: The needle punctures the K-Cup to extract the coffee. It’s essential to keep it clean, as clogs may affect the brewing process.
- Water Reservoir: This component stores the water needed for brewing. It is removable in most models, making it easier to refill and clean.
- Display: The display usually contains essential buttons, such as power, brew size options, and menu functions. In more advanced models like the Keurig 2.0 and K-Supreme, the display may include additional features and settings.
- Menu: The menu is available in advanced models and offers various customization options, such as brewing temperature, clock settings, and more.
Knowing these key components and their functions will help you troubleshoot and reset your Keurig when needed.
Visit the Keurig support page for more information on specific models and common issues faced by users.
How To Reset My Keurig?

Simple Reset Process
To reset your Keurig coffee maker, follow these steps:
- Turn off and unplug your machine for safety.
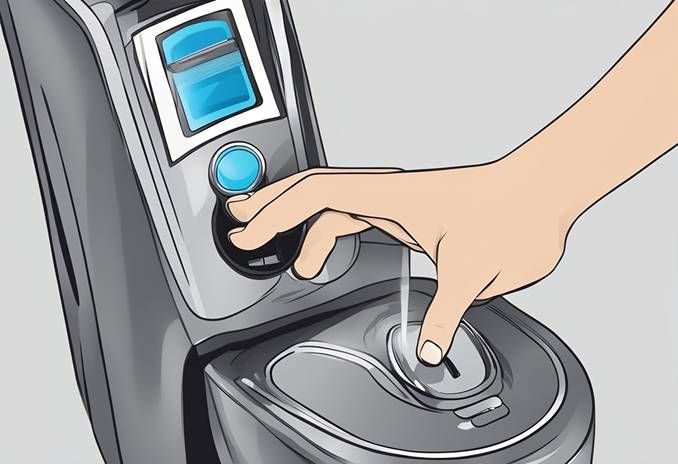
- Remove the water reservoir and give it a quick rinse. Clean any gunk off the connectors.
- Wait for a couple of minutes with the water tank off.
- Plug the Keurig back into the designated outlet.
- Turn the machine back on and put the reservoir back in place.
For a Keurig K-Classic:
- Press and hold the medium cup, large cup, and auto-shutoff buttons at the same time.
- Hold them down for about 10 seconds.
- Release the buttons at the same time.
For a Keurig K-Supreme:
- Press and hold the two arrow buttons for three seconds.
- The “Setting Menu” will appear. Press the right arrow button to proceed.
- Press the right arrow button seven times until the “Factory Reset” appears on the screen.
- Press the “K Button” and press the right arrow button to confirm.
Addressing Minor Glitches
If your Keurig isn’t functioning as expected, try these steps to resolve minor glitches:
- Open and close the lever to reset a brew cycle that was interrupted.
- Inspect the K-Cup for any damage or improper placement.
- Check for blockages in the nozzle and puncture needles.
- Clean the machine using a descaling solution to eliminate any mineral buildup affecting performance.
By following these steps, you can ensure your Keurig coffee maker operates smoothly and efficiently.
Basic Troubleshooting Steps

Checking Power Supply and Connections
First, check whether your Keurig has a stable connection to the power supply.
Ensure that the power cord is securely plugged into both the machine and the outlet. Sometimes, a loose connection may cause the machine to malfunction.
If your Keurig isn’t brewing, try a basic power cycle, as suggested by wikiHow.
Turn the machine off, unplug it from the wall for at least 30 seconds, and switch it back in to see if this resolves the issue.
Inspecting the Water Tank and K-Cup Holder
Inspect the water tank and ensure it is filled with fresh water; an empty or near-empty tank might cause some common issues.
Make sure it is seated properly and that there are no obstructions in the water flow. Remove the K-Cup holder gently and clean it thoroughly, as coffee grounds or debris may be affecting the brewing process.
Looking for Error Messages
Pay attention to any error messages displayed on the LCD screen or through indicator lights.
Familiarize yourself with the meaning of these messages by referring to your Keurig manual or checking manufacturer’s website.
For example, the Keurig K Classic way to reset can be by pressing and holding the medium cup, large cup, and auto-shutoff buttons simultaneously for about 10 seconds.
Remember to be patient and follow these basic troubleshooting steps if your Keurig is experiencing a malfunction.
Most importantly, consult the user manual for specific instructions that may pertain to your particular model.
Advanced Reset Techniques

Resetting the Internal Computer
When simple resets don’t work, it may be necessary to reset the internal computer of your Keurig.
One way to do this is by power cycling the device. First, unplug it and wait for a minute. During this time, you can clean any debris from the connectors and rinse the water reservoir.
After waiting, plug your Keurig back in and see if it functions correctly. If not, you may need to try other advanced reset techniques.
Factory Setting Restoration
Another option is to restore your Keurig to its factory settings.
This is sometimes necessary when your machine’s preferences have become corrupted or when you want to start fresh:
- For Keurig K-Classics: Press and hold the medium cup, large cup, and auto-shutoff buttons simultaneously for about 10 seconds, then release.
- For Keurig Minis: Open and close the K-Cup lever, then turn off the device and unplug it. Remove the water reservoir, reattach it, plug the machine back in and power it on.
Keep in mind that resetting your Keurig to factory settings erases all your saved preferences and customizations.
After completing the process, you will need to set up the device again, including adjusting the brew size, water temperature, and other preferences.
Using these advanced reset techniques, you should be able to address any issues with your Keurig and enjoy a perfect cup of coffee again.
When to Contact Customer Service

Sometimes, despite your best efforts to reset your Keurig machine, it may still malfunction or not operate correctly.
In these cases, it’s a good idea to reach out to Keurig’s customer service for assistance.
Their friendly and knowledgeable team can help troubleshoot any issues you may be experiencing.
Before getting in touch with customer service, check if your Keurig is still under warranty.
Warranties typically cover any repairs or replacements due to manufacturing defects or malfunctions.
Knowing your warranty status will help determine the best course of action when speaking to a Keurig support representative.
To make the most of your conversation with customer service, make sure to gather the following information:
- Model number and serial number of your Keurig machine
- Any error messages or codes displayed on the device
- A description of the issue you’re experiencing
- The steps you’ve taken to try and reset the machine
Keurig’s customer service can usually be reached through:
- Phone
- Live chat on their website
Remember, it’s important to be patient and cooperative when speaking with a Keurig support representative.
They are there to help you and will do their best to resolve your issue as quickly as possible.
In conclusion, contacting Keurig customer service is a useful step when trying to resolve issues with your machine.
Just make sure you have all the necessary information and a friendly attitude to make the process as smooth and efficient as possible.
| Step | Instruction |
|---|---|
| 1 | Unplug the Keurig from the power source. |
| 2 | Wait for at least one minute to allow the machine to cool down and reset. |
| 3 | Plug the Keurig back into the power source. |
| 4 | Lift and close the handle to make sure it’s properly closed. |
| 5 | Press the power button to turn on the Keurig. |
| 6 | Wait for the machine to finish its startup process. |
| 7 | Once the machine is ready, it’s reset and ready to use. |
Conclusion
Resetting your Keurig brewer can often solve a range of issues you may encounter, from brewing malfunctions to problems with the digital display.
Whether you’re a coffee enthusiast faced with a Keurig that has stopped working as expected or simply preparing your morning cup and notice something is off, knowing how to reset your Keurig can be invaluable.
The process is straightforward, often requiring just a few simple steps that can be completed without the need for professional assistance.
Frequently Asked Questions

How to reset my Keurig coffee maker after descaling?
After descaling your Keurig, resetting it is simple. We’ll show you how to reset it – first, turn off the machine and unplug it for a few minutes.
Next, remove the water reservoir, give it a rinse, and clean any gunk off the connectors.
Finally, reattach the water reservoir, plug the machine back in, and turn it on. Good News – your Keurig should now be reset.
What steps should I take if my Keurig won’t power on?
If your Keurig won’t power on, first check that it’s plugged into a functioning outlet and that there are no issues with the power cord.
If the issue persists, try resetting the machine by unplugging it for a couple of minutes and then plugging it back in.
If your Keurig still doesn’t power on, it’s best to contact Keurig customer service for further assistance.
How do I perform a factory reset on my Keurig Supreme Plus?
Performing a factory reset on a Keurig Supreme Plus is currently not possible, as there is no specific factory reset procedure available for this model.
If you are facing issues with your Keurig Supreme Plus, it’s recommended to reach out to Keurig customer service for guidance on troubleshooting and potential solutions.
What’s the process for resetting a Keurig Slim?
To reset a Keurig Slim, turn off the machine and unplug it for a couple of minutes.
Then, remove and clean the water reservoir.
While the machine is still unplugged, hold the brew button for about 5 seconds, and then plug it back in while still holding the button.
After a few seconds, release the button, and the machine should reset.
Can you guide me through resetting a Keurig K-Classic?
Resetting a Keurig K-Classic is easy. First, ensure the machine is off and unplugged.
Remove and clean the water reservoir, and then plug the machine back in.
Power it on and let it detect the absence of the reservoir.
Once the “add water” light comes on and starts flashing, fill the reservoir with fresh water and reattach it. Your Keurig K-Classic should now be reset.
Why isn’t my Keurig responding when I try to brew a cup?
If your Keurig isn’t responding when you try to brew a cup, it could be due to several reasons.
First, ensure there’s enough water in the reservoir and that it’s properly seated.
Next, make sure the brewer’s handle is fully closed.
If the issue persists, try resetting the machine by unplugging it for a few minutes and then plugging it back in.
If your Keurig still isn’t responding, consider reaching out to Keurig customer service for further assistance.

