Electricity has brought much convenience into our life, including electric coffee makers which have definitely significantly simplified our daily coffee routine.
But many coffee lovers are still loyal to manual brewing methods for the joy and satisfaction in making a tasty and aromatic cup of coffee by hand.
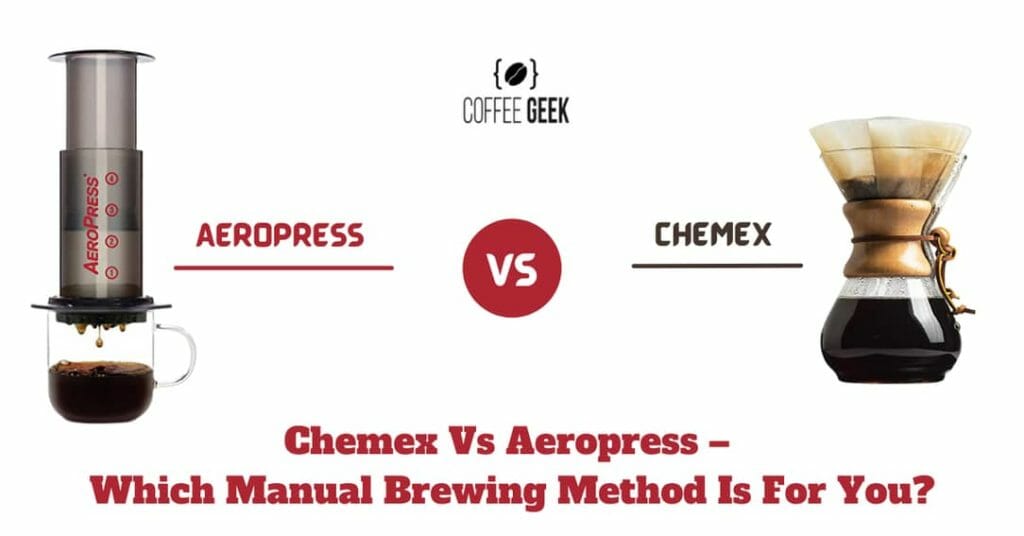
In this article, we’ll take a look at 2 popular manual coffee makers, Chemex vs AeroPress, to identify their differences and determine which one suits your personal preference the best.
What’s A Chemex Coffee Maker?
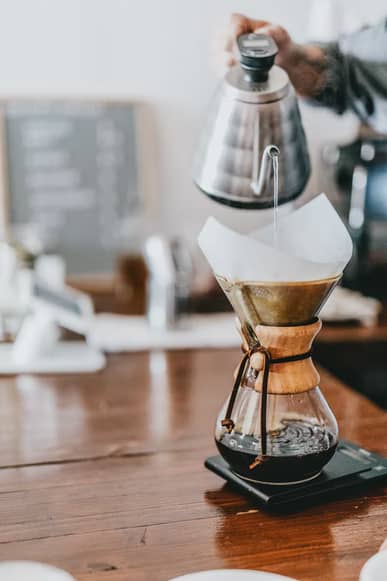
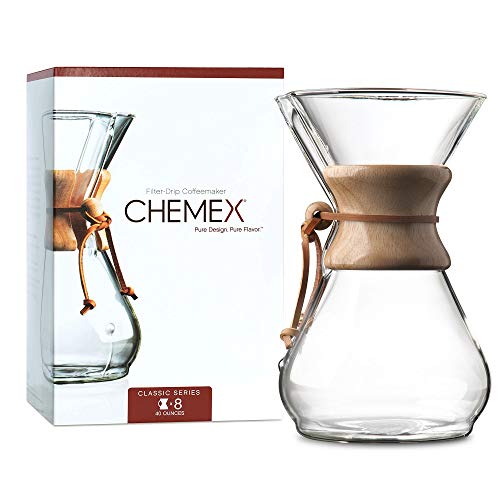
A Chemex is a Pour-Over manual brewing device that’s most popularly known for its striking hourglass-shaped glass appearance.
What is Pour-Over coffee?
Pour-Over brewing methods involve pouring hot water evenly over the bed of coffee grounds. The extracted coffee then drains through a paper filter into the carafe or mug below.
As you can probably tell, it’s pretty damn similar to the electric drip coffee brewing machine that’s still being used by over 40% of coffee drinkers in the US in 2020.
Well, the coffee brewing process is pretty much the same. But rather than relying on the drip coffee maker to automatically brew one cup, you have to take things into your own hand with the Pour-Over coffee brewing methods.
The Chemex is not like other Pour-Overs, which are often just dripper cones.
With the hourglass-like construction, the top conical part of the Chemex acts as the dripper that carries its special bonded paper filter.
And the bottom glass chamber acts as a glass carafe that will hold the extracted coffee directly dripping from above.
The “waist”, the narrowest area on the Chemex, is where the barista will hold to pour the final brew into the serving cups.
As the Chemex is made of tempered borosilicate glass, a big and thick heatproof wooden collar is wrapped around here to make the handling of the device easier to manage and prevent potential burning risks.
A leather tie is also loosely tied by hand around the collar to keep it in place, adding a charming touch to the whole piece.
That’s understandable since the Chemex was invented and designed not just purely as a functional coffee maker, but for aesthetic reasons as well.
How To Brew Coffee With A Chemex?
Here are some of the factors you need to keep in mind to pull off manual brewing with a Chemex.

Coffee Beans
Roast Profile
You can pretty much use any roast profiles for the Chemex method, but as with all coffee brewers, some are more ideal than others.
In the case of this coffee maker, light and medium roasts are better matches than dark roasts.
The brewing time of around 4 minutes and the extraction process help effectively draw out the wonderfully complex flavor profiles with delicate citrus and other fruity and floral notes.
It’s definitely a great choice for fans of brighter acidity.
On the other hand, the dark roasts don’t preserve as many original coffee compounds. Their appeal is in the deeper, more intense, and bolder flavor, full-body, and coffee oils.
But the bonded paper filters used for Chemex are extra thick to produce a very clean taste and smooth manual brew.
So hardly any natural oils will make it to the final cup like how the French Press works. And all you’re going to taste is a lackluster dark and burnt taste.
Coffee Grind Size
After picking out the right beans, pull out your grinder and load them in to get a fresh medium-coarse grind size.
The French Press brews coffee using the immersion method where all the grounds are steeped in near-boiling water during the entire brewing time. So French Press calls for a coarser grind.
On the other hand, taking the brew time, the extraction method and the construction of the Chemex into account, this relatively finer size is a much better choice for an optimized water flow rate and coffee extraction.
Check out my ultimate coffee grind chart for more information!
Water
The recommended water temperature for brewing coffee is between 195 to 205 degrees Fahrenheit (91 – 96 degrees Celsius).
It’s best to grab a thermometer or an electric kettle with temperature control to get the temperature right when heating water.
But if you don’t have one and aren’t sure how to estimate, just bring the water to a boil then let it cool off with the cover off for roughly a minute and you can use it to begin brewing.
The recommended coffee-to-water ratio for a Chemex is around 1:15. The Golden rule to go by is to use 5 oz (148 ml) of water for every tablespoon of coffee.
Give that ratio a try at first and you can adjust it based on your coffee strength preference going forward because you’re going to do a lot of practice anyway.
How come? Making a perfect cup of Pour-Over coffee isn’t easy.
The process takes patience and a learning curve to master the craft of pouring hot water over the grounds bed to evenly extract a balanced and satisfying resulting brew.
But before freaking out, hear me out. There’s a tool out there that can make the process easier to navigate, the gooseneck kettle.
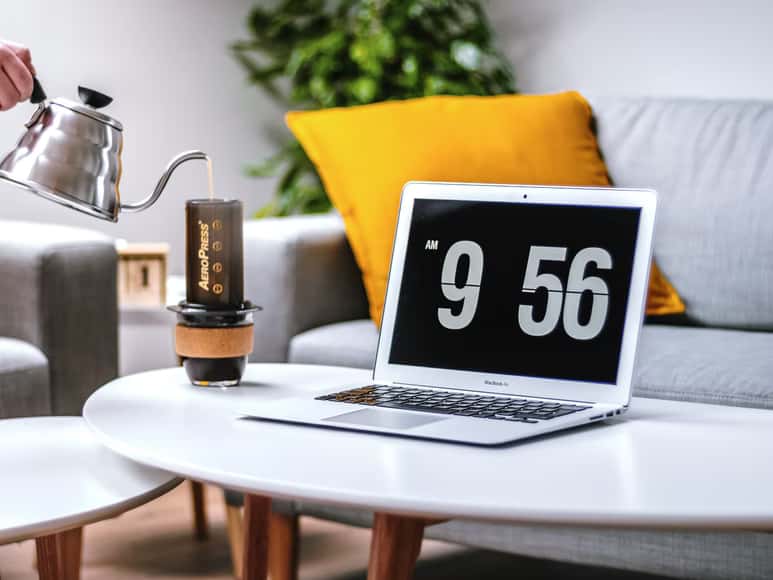
Its name already describes how it’s designed. The gooseneck will assist your pour for better flow rate and pouring precision.
If you intend to commit to Pour-Over coffee brewing methods. Owning a Gooseneck Kettle is a worthwhile investment.
Paper Filters
As I’ve mentioned above, brewing with Chemex calls for a different special kind of bonded paper filter that’s thicker and costs a bit more money.
But the design is intentional to effectively filter out any unwanted bitter elements, oils, and lost grounds to make sure the final brew is only filled with clean and desirable aromatic compounds.
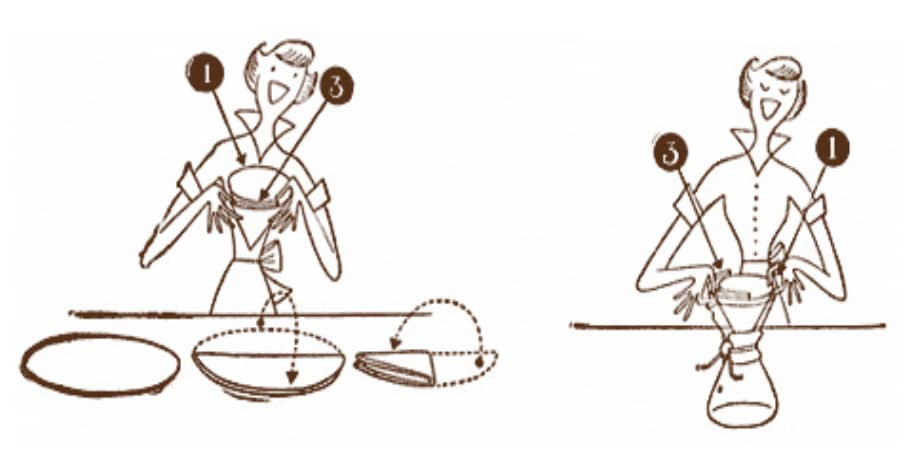
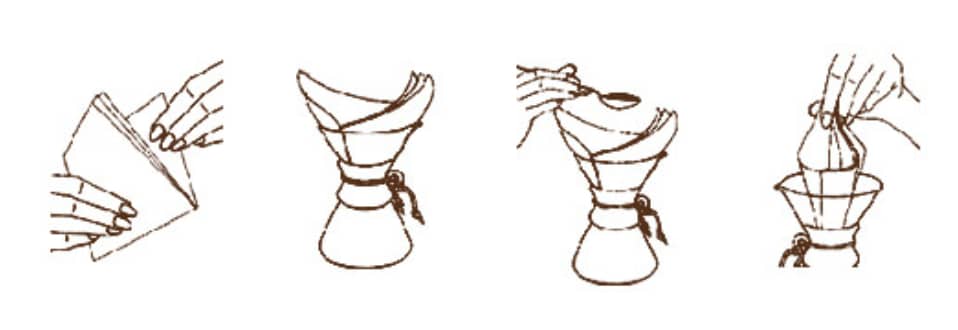
The bonded paper filters can come in 3 shapes, but they all can be folded to function the same way.
Traditional Full-Circle Filter
- Fold the full-circle filter in half twice.
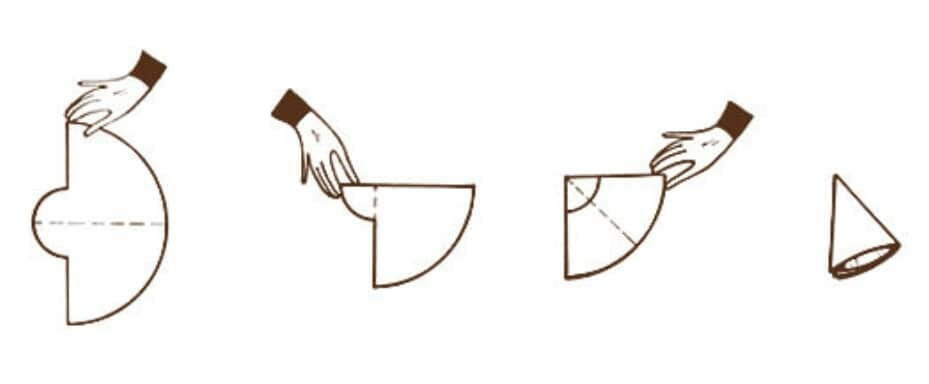
Half Moon Filter
- Fold the half-moon filter in half.
- Fold the tip in.
- Fold the filter in half again.
Square Filter
- Fold the square filter in half twice.
Then, place your finger between the 2 outer layers (3rd and 4th) of the filter to open it into a funnel.
Place it into the Chemex so that the triple-fold part covers the pouring spout.
Instructions
Step 1: Preheat
Pour hot water over the filter and the Chemex to get rid of the paper flavor and preheat the brewer. You can swirl it around to make sure that all areas are heated up.
Then discard the water afterward.
Step 2: Bloom
You can place the Chemex on a scale before starting to get the coffee-to-water ratio right.
Add coffee grounds to the brewer and shake to level them. Use the gooseneck kettle and pour just enough hot water evenly over the grounds bed to wet it.
Set up a timer and let it bloom for 30 seconds.
Step 3: Brew
Slowly pour the rest of the hot water over the grounds in a circular motion in around 3 minutes 30 seconds so that you meet your coffee-to-water ratio quota.
Step 4: Serve
Discard the filter and serve the good coffee in a cup and enjoy your coffee time.
What’s An AeroPress Coffee Maker?
An AeroPress is another iconically creative manual coffee-making invention. It’s most well-known for its syringe-like appearance, espresso-style coffee, and portability.
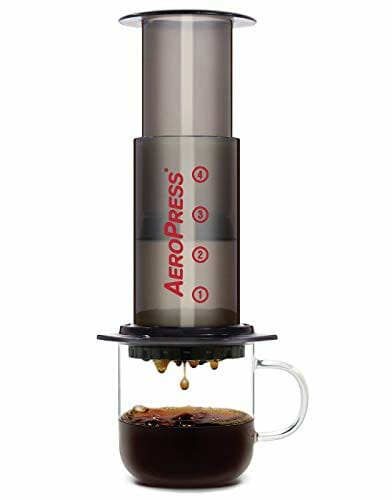
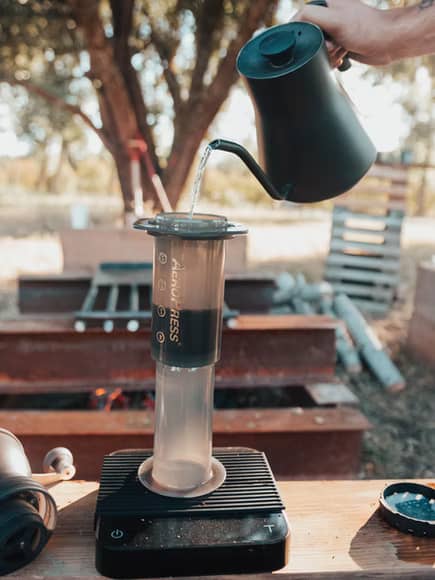
The AeroPress, invented by Alan Adler, features a long grey cylindrical brewing chamber with a filter cap attached at the bottom, a plunger, and an airtight silicone seal. Sounds even more like a syringe now, doesn’t it?
It, in fact, does make coffee in a similar fashion. Without the needle, of course.
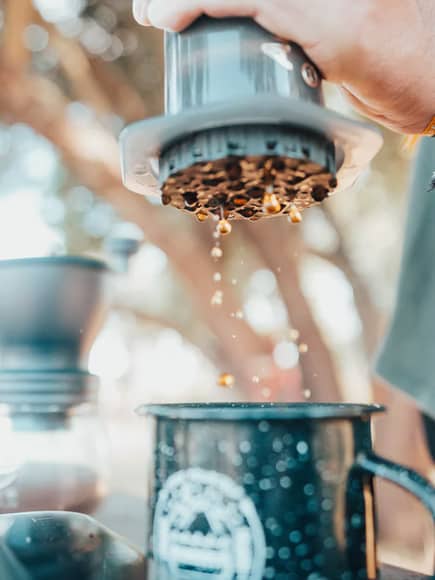
The AeroPress is placed on a cup. Coffee grounds and hot water go into the brewing chamber. Then the plunger is inserted to push the extracted coffee through the filter into the cup below.
And what else does the plunger remind you of? Aha! The French Press!
However, the plunger on the French Press acts more as a gate-keeping tool to keep the extracted coffee and the used grounds separate after brewing rather than for brewing like the AeroPress.
But the two devices also share a bit of common ground in the brewing method as well. AeroPress features a quick immersion as the grounds are steeped in hot water in the chamber before the plunger is inserted.
Other than that, the AeroPress brews coffee using pressure similar to an espresso machine as well.
Due to the silicone seal, when the user pushes down the plunger, pressure is applied which contributes to producing a thick and strong coffee brew. That’s why many refer to a cup of coffee made using the AeroPress as espresso-style.
The brew time of the AeroPress can also take less than a minute, comparably as quick as making espresso.
How To Brew Coffee With An AeroPress?
Coffee Beans
Roast Profile
This is a versatile coffee brewer so you can pretty much use any type of beans or roasts.
Either go with your personal preference or pick a darker roast for the ultimate manual espresso-like experience.
If you don’t know where to start, check out my top picks of the best coffee beans for AeroPress.
Coffee Grounds Size
If you’ve checked my ultimate coffee grind chart, you’d know that you need a finer grind for this device, ranging from medium to fine size.
Due to the significantly short brew time compared to typical methods that take 4 – 5 minutes, finer grounds enable better coffee-to-water contact and extraction, similar to espresso.
Water
For the water temperature and pouring, go with my suggestions for the Chemex.
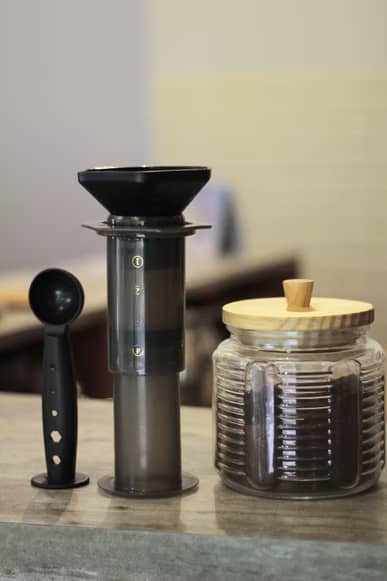
Luckily, the coffee-to-water ratio is a no-brainer as well because this device always comes with a ground scoop and clear-as-day water level marks on the chamber.
Just follow the brand’s instructions and you’re good to go; or else, adjust the input based on your strength preference.
Paper Filters
You can use a normal paper filter for the AeroPress that’s cheap and easy to find.
But other filters such as mesh and metal can work as well. We did an AeroPress extraction test with all of them in the past to find which brings the best results.
Each has its pros and cons so check the article out for more information.
AeroPress Brewing Methods
Traditional Method
Step 1
Place the filter into the cap and twist the cap to the chamber.
Place the whole piece on a sturdy cup.
Step 2
Add one scoop of ground coffee to the chamber. Shake the piece to level the grounds bed.
Step 3
Add hot water to the Level 1 mark. Use the stirrer to stir the mixture for around 10 seconds.
Step 4
Insert the plunger and slowly press it down to push the extracted coffee out. Pause a few moments if there’s resistance.
Inverted Method
Step 1
Insert the plunger into the chamber, but not all the way through.
Step 2
Add grounds and hot water like the Traditional Method’s steps 2 and 3.
Step 3
Soak the filter with hot water before placing it into the cap. Twist the cap to the chamber afterward.
Step 4
Invert the whole piece and place it on a sturdy cup.
Slowly press down the plunger like the Traditional Method’s step 4.
Chemex Vs AeroPress Coffee Makers – How Are They Different?
Taste
There’s no clear winner in this AeroPress vs Chemex clash because the taste is a very subjective and relative thing.
Though both make use of filters, Chemex’s thicker bonded filter produces a much cleaner and brighter cup of coffee.
And, due to the pressing action, AeroPress makes coffee that’s fuller-bodied, similar to a French Press or espresso.
Ease Of Use
From my deep dive above, you can probably tell that pressing down a giant syringe plunger should be easier to navigate than mastering the craft of pouring water evenly to extract coffee.
In this AeroPress vs Chemex round, the former takes more effort as resistance can be strong sometimes, and the latter takes some serious skills.
Brew Time
Making coffee with the Chemex takes at least 4 minutes for blooming and pouring. You need more time to prepare the grounds, the water, and preheating as well.
On the AeroPress, while you still need to grind the beans and heat the water, the process itself only takes around 1 minute.
And the convenience of accompanying tools such as the ground scoop, stirrer, and water level marks make preparation all the easier as well.
Versatility
Since you can make espresso-style coffee brews using the Traditional and Inverted methods, they can be used as the base for other coffee recipes as well, like with French Press coffee. They include:
- Americano (add water)
- Latte, cappuccino, flat white, and other milky espresso-based drinks (add milk)
- Iced coffee (add ice)
And with small alterations, you can brew Cold Brew with the AeroPress as well. Replace hot water with cold water and stir for 1 minute instead of just 10 seconds.
Chemex, on the other hand, is less versatile in terms of recipes. But by adjusting the ratio and the pouring technique, you can still experiment with different Chemex coffee tastes.
Ease Of Clean Up
Generally, these are both easy to clean. But AeroPress is definitely easier to handle since it’s made of polypropylene, a type of FDA-approved and BPA-free plastic, rather than glass. 50 points to AeroPress!
Portability
I think we both know which one is the winner here as well.
The manufacturer also supplies an AeroPress version made specifically for portable purposes called AeroPress Go, which is smaller but comes with a convenient mug and lid to enjoy coffee anywhere.
The Chemex is more bulky and vulnerable so be careful and try not to take it out too often.
Cost
Compared to electric brewers, these manual devices are definitely more affordable in comparison.
The AeroPress is sold at a cheaper retail price but it can hold a lot less coffee, usually promoted as a single-cup brewer with its limited capacity (10 oz/296 ml).
So, if you want to brew several cups at once, consider getting a Chemex to brighten up your kitchen counter with both the glass vessel looks and the aroma.
The smallest Chemex size is 3 cups of 5 oz (148 ml) and the biggest is 10 cups.
The Verdict
As a true Coffee Geek, I like both, but I will pick either a Chemex or an Aeropress depending on what type of brew I’m in the mode for. So….
Pick Chemex if you:
- Prefer clean-tasting coffee highlighted by bright acidity and fruity notes;
- Often make more than one cup of Joe;
- Enjoy the practice of brewing Pour-Over coffee;
- Don’t prioritize portability.
Pick AeroPress if you:
- Prefer full-bodied coffee similar to French Press and espresso;
- Want a single-cup brewer;
- Enjoy brew versatility;
- Want the most affordable option;
- Prioritize portability.

