AeroPress leaking water can easily punch a hole right through your otherwise lovely day.
Having hot water slip through into the brewing chamber as you’re brewing coffee presents a whole host of issues.
When an AeroPress leaks, not only does it stand to make a mess (and possibly even cause minor injuries, depending on where the hot water ends up), it results in weaker coffee and may also cause ground coffee to end up in your cup.
If you’ve brewed coffee with your AeroPress and noticed a leak, there’s definitely something wrong.
Let’s get down to the problem and see how you may be able to fix it.
Below, We Explain:
How a leaking AeroPress is possible
The most common causes of an AeroPress leak
Easy solutions to the majority of problems
Can An AeroPress Maker Coffee Actually Spring a Leak?
It definitely can. But nine times out of ten it’s not a leak in the sense that the AeroPress has some kind of structural defect or that the brew chamber has a hole in it.
Most of the time the problem comes down to user error—which is a good thing because it’s easily fixable.
Other times you may be doing everything by the book, but there’s still something else you can do to help your AeroPress keep its water-tight seal as you’re brewing coffee.
Occasionally though, a critical part may have worn out to the point it’s no longer able to do its job properly, and you’ll need to replace it.
But even in that case we can likely offer a useful tip or two to prevent it from happening again, or at least delay it a lot longer next time.
Let’s assess the problem.
Why Is Your AeroPress Leaking Water?
If your AeroPress is letting water out of the brew chamber as you apply pressure to the plunger, the problem likely comes down to one or more of the following:
Your brew method
The filter cap
The rubber seal
The size of your coffee grounds
How you’re grinding your coffee beans
The Most Common Causes of Leaking AeroPress
Making AeroPress coffee is pretty straightforward, and it’s designed to be simple, but it’s still not nearly as foolproof as using a French press or a drip coffee maker.
Because of the pressure involved in making AeroPress coffee, everything needs to fit perfectly and be properly set up in order to ensure no water escapes the brew chamber.
There’s actually a lot going on behind the scenes here, so let’s make sure you’ve got everything in order.
1. Leaking – It’s All Your Fault
Let’s get this one out of the way because it’s easy and I’ve made it personal.
How hard are you pushing the plunger down?
If you’re new to the AeroPress, trying out the inverted method, or even one of the OG AeroPress brewers, it’s easy to overdo it on the pressure.
In the beginning, it’s often surprising to people that the device demands so much strength to do its thing.
For those newly using the inverted method, the tweaked arrangement of the AeroPress can throw off their force feedback and cause them to overdo it.
For veterans, using their AeroPress becomes such a subconscious function of muscle memory that they don’t realize they’ve been using more pressure over time.
Whatever the cause, while the AeroPress needs a good amount of pressure in order to do its job if you overdo it, it’s likely to cause some water and coffee particles to get forced through the brewing chamber.
Try easing up a bit. Remember, a great AeroPress coffee maker can’t be rushed!
2. The Filter Cap
The obvious angle here is that the filter cap may not be perfectly fitted onto the AeroPress.
This can happen much more easily if you brew inverted with a metal filter, and if it does, it’s a sure thing that your AeroPress will leak.
Beyond user error though, it’s possible your AeroPress filter cap may have become warped or bent.
Some early AeroPress users reported issues with this piece and it’s been noted that buyers of the earliest model received free replacements for theirs if they encountered this issue.
Having said that, especially this far into the product’s lifecycle, it’s unlikely you’ve got a faulty filter cap. Do, however, double-check that you’re affixing that paper filter properly!
3. The AeroPress Seal
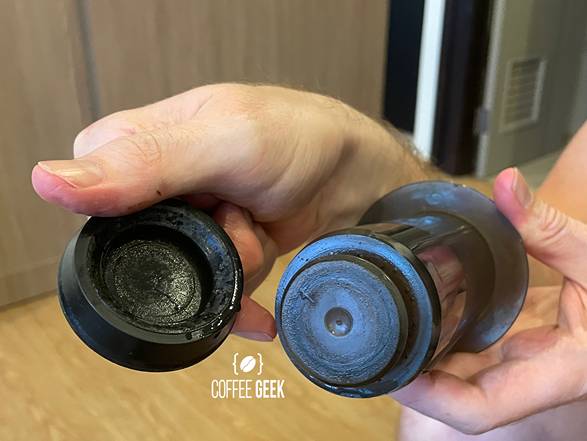
The integrity of the rubber seal on the end of the plunger is critical to ensuring all the coffee grounds along with all the hot water they’re brewing in stay contained within the chamber.
This may in fact be the most overlooked factor, especially relative to its importance.
If your rubber seal wears out or warps—which can happen much more easily than with the filter cap—you’re going to end up with a leaking AeroPress as well as ground coffee in your cup.
Whether you use the AeroPress upside down with the inverted method or stick to the standard method, you have to take good care of your AeroPress seal.
Take a look and verify that the seal isn’t dried out, crumbling, or hard to the touch. Also, make sure it’s clean and free of any leftover coffee particles from previous brews.
Over time though the AeroPress seal will inevitably degrade to the point it needs to be replaced.
This is normal and will eventually occur whether or not you treat your AeroPress better than a newborn baby.
If it’s been over 2 years and/or you tend to let cleaning and maintenance fall by the wayside, it may simply be time for a new seal.
Fortunately, they’re relatively inexpensive and widely available—including through the company’s website.
4. Your Grind Size
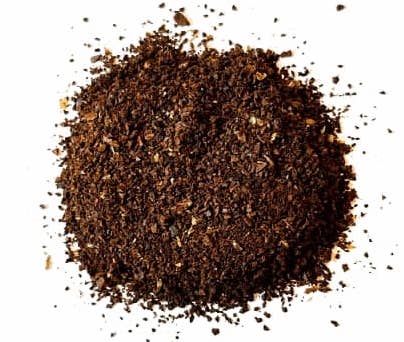
The AeroPress is designed to work with medium-fine ground coffee, and while it can usually handle slight variations in grind size, you have to be careful not to use a very coarse grind or too much of a finer grind.
Going too far in either direction will put additional strain on the air-tight seal that’s critical to the brewing process.
If your grind size is too fine, the coffee grounds will more easily slip between the rubber seal and the wall of the AeroPress chamber.
If it’s too coarse—or more precisely too rough and uneven—the same thing can easily happen.
5. Consistency of Coffee Grounds
When it comes to ground coffee as the root of the problem, however, it’s more often consistency than grind size itself.
We always recommend using a quality electric burr grinder that allows you to dial in the ideal grind size.
Burr grinders also ensure all the coffee is evenly ground, which is critical to avoiding a big mess caused by a leak.
When it comes to grinding your coffee, concentrate on consistency and consider picking up a quality grinder before brewing your next cup.
It will definitely help the AeroPress completely stop any water from leaking through.
How to Prevent AeroPress Leaks Over Time
The biggest cause of leaks that develop over time is rubber seal degradation, which tends to result from storing the AeroPress improperly or forgetting to maintain it.
Here’s what you can do to avoid leaking issues in the future:
Proper Storage
Did you know you’re not actually supposed to keep the AeroPress fully assembled (i.e. nested into itself) when you store it?
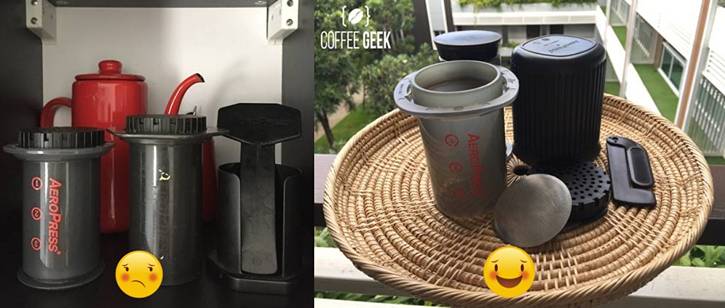
Doing so actually accelerates the seal’s inevitable decline. When stored inside the chamber, the seal dries out, losing all of its lubrication and becoming temporarily rigid.
While in this state, if you then pull the plunger out of the device when you go to use it, the friction of the seal against the chamber walls will damage the seal.
Maintenance with Mineral Oil
We go into this solution in depth in our recent article all about this crucial little component, but the short of it is that you can extend the life of your AeroPress seal by using some mineral oil and heat to restore its elasticity after it’s gotten a little dried out and beaten up.
Check out the method, give it a try and let us know how it works for you!


