Most coffee drinkers have heard of the coffee maker brand Moccamaster, but many don’t know how to use a Moccamaster coffee maker.
I’m here to tell you that it’s not as difficult as you might think!
Before I start, let’s get one thing straight – I love coffee. Like, really love coffee. And I’m picky about my coffee makers.
So when I say that the Moccamaster is among the best drip coffee makers out there, trust me – I know what I’m talking about.
The Moccamaster is a drip coffee maker that was designed by the family-owned Dutch company Technivorm. It’s been around since 1968 and it’s still going strong today.
In fact, the Moccamaster is so popular that it’s been awarded the Specialty Coffee Association of America (SCA) seal of approval.
In this guide, I’ll show you how to use a Moccamaster coffee machine so that you can make delicious coffee at home.
Let’s get started!
Introducing the Moccamaster
Before we get into the coffee brewing process, let’s take a look at the Moccamaster coffee maker itself.
There are two main categories of Moccamaster coffee machines – the glass carafe models and the thermal carafe models.
Let’s take a closer look at each category.
Glass Carafe Models
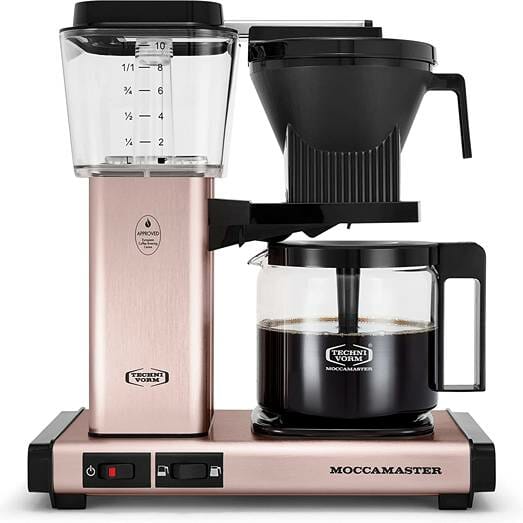
The glass carafe models come with a copper boiling element and a glass carafe.
The brewing element keeps the water at the optimal brewing temperature, while the glass carafe ensures that your coffee stays warm.
The Technivorm 59691 KBT is a glass carafe model that comes with a 10-cup capacity.
So if you’re brewing coffee for a group of people, this is the Moccamaster for you.
Another glass carafe model that I love is the Moccamaster 59616 KBG. This one has an auto-drip basket that stops the flow of coffee once the carafe is full.

The KBGV Select is the glass carafe Moccamaster model that allows you to switch between brewing a full pot of coffee and brewing half a pot.
So if you don’t need a full 10 cups, you can save some coffee (and some money) by brewing a smaller batch.
Thermal Carafe Machines Models
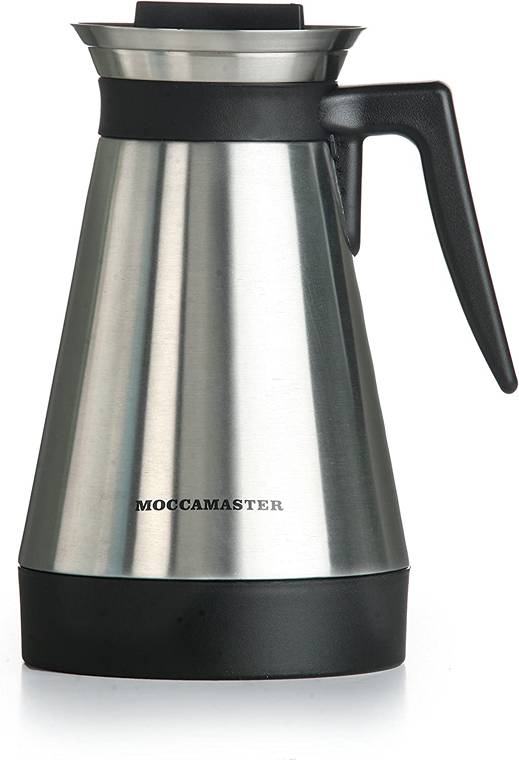
The thermal carafe models come with a double-walled, stainless steel thermal carafe.
These are my personal favorite because they keep your coffee warm for up to 1 hour – without the need for a heating element.
What makes the thermal carafe models even better is that they come with a travel lid that maintains the temperature of your coffee while you’re on the go for several hours.
So if you need to take your coffee with you, these are the best Moccamasters for you.
The Technivorm Moccamaster makes four different thermal carafe models:
- Technivorm Moccamaster KBT
- Moccamaster KBTS
- Moccamaster CDT Grand
- Technivorm Moccamaster Single Cup
The KBT and the KBTS have the same features. What sets them apart is that the KBT is a 10-cup coffee maker while the KBTS is a smaller, 8-cup coffee brewer.
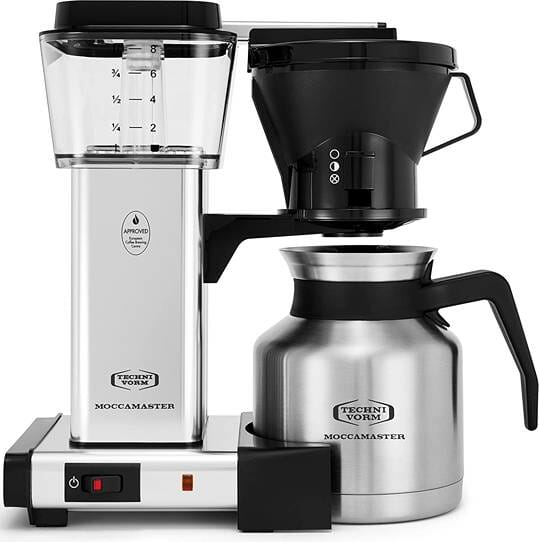
I own the KBT and this is the one that I’ll be using for this guide.
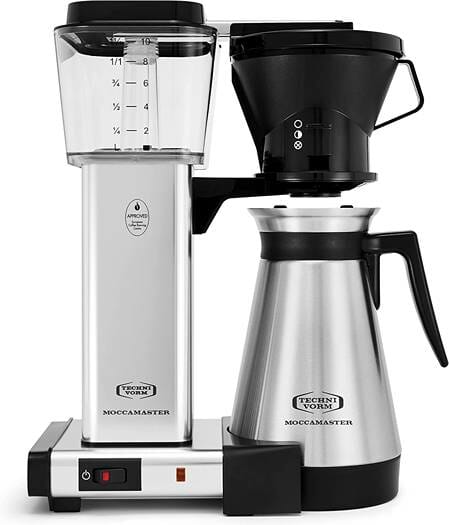
The CDT Grand is the biggest thermal carafe Moccamaster. It has a 15-cup capacity, making it perfect for large groups of coffee drinkers.

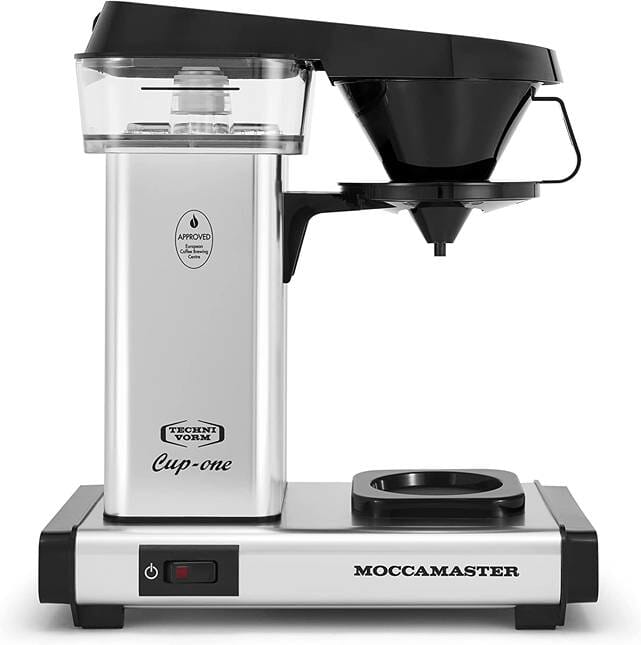
Finally, the Technivorm Moccamaster Single Cup is exactly what it sounds like – a Moccamaster that brews one cup of coffee at a time.
So if you’re the only coffee drinker in your household, this is the perfect Moccamaster for you.
The Different Parts of the Moccamaster Coffee Maker
I’m going to be using the Technivorm Moccamaster KBT for this guide. But before we get into the brewing process, let’s take a look at the different parts of the Moccamaster coffee maker.
Please note that while the Moccamaster models may look different, they all have the same basic parts and the brewing process is the same for all of them.
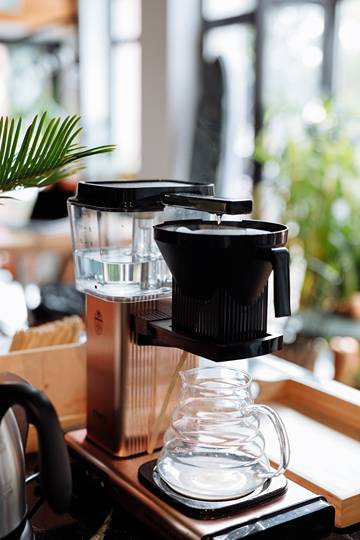
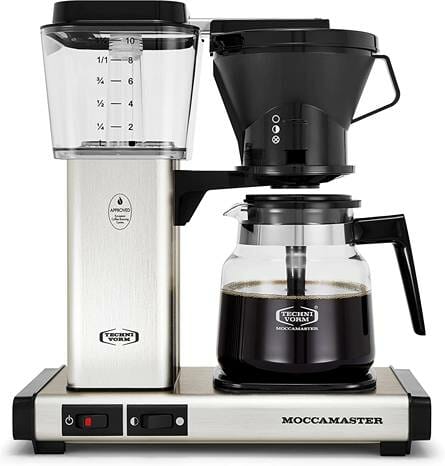
The Moccamaster has 5 main parts:
- The water tank
- The brew basket
- The metal wand
- The thermal/glass carafe
- The base
I’ll go into more detail about each part below.
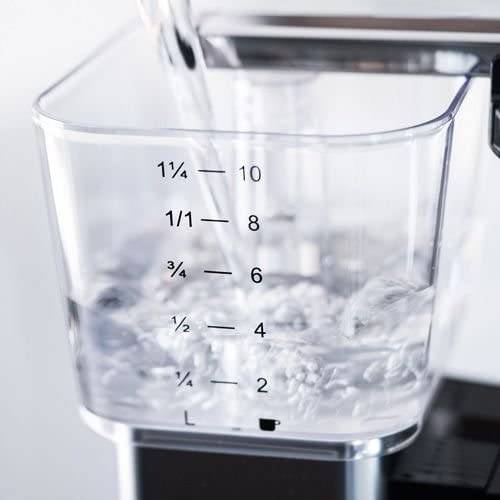
The Water Tank
All of the Moccamaster models come with a water tank.
This is where you’ll add the water that will be used to brew your coffee.
The water tank is located on the top of the Moccamaster and it’s labeled with the measurement markings (in ounces and cups).
The Brew Basket with a Filter
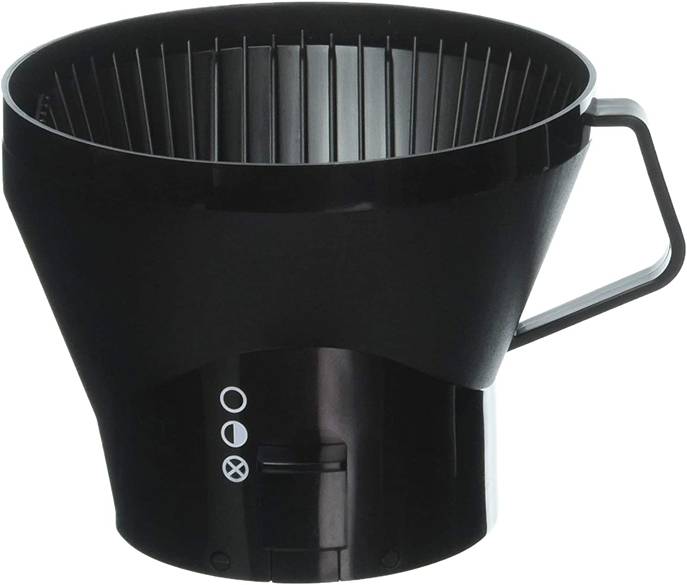
The brew basket is where you’ll add the coffee grounds. It’s located near the water tank on the top of the Moccamaster.
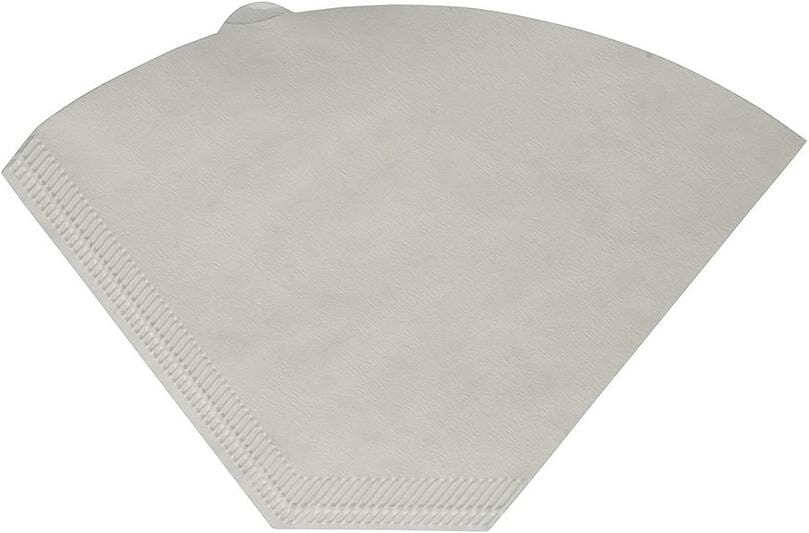
The brew basket has a paper filter that’s inserted into it. I recommend using Moccamaster’s own filters, but you can also use other brands of paper filters.
For easy handling, the brew basket comes with a handle.
This allows you to remove it from the Moccamaster without any spillage.
The Metal Wand
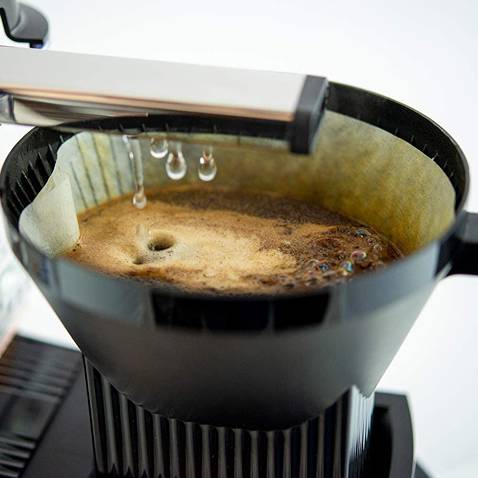
The metal wand is located on the side of the Moccamaster and it’s used to feed the water from the tank into the brew basket.
The shower head at the end of the wand has nine small holes that evenly distribute the water over the coffee grounds.
The Thermal/Glass Carafe
The thermal/glass carafe is where the brewed coffee will end up.
For the thermal models, the carafe is double-walled and made of stainless steel.
For the glass carafe models, the carafe is made of heat-resistant glass.
The carafe has a lid that helps to keep the coffee warm for a longer time.
The Base
The base is where the Moccamaster sits. It has a cord that plugs into an outlet and it has a switch that turns the coffee maker on and off.
How Do You Brew with Moccamaster the First Time?
As said before, whatever model you have, the brewing process is the same.
So, if you want to know how you use the Moccamaster coffee maker, here’s a step-by-step guide:
What You’ll Need:
- Moccamaster coffee maker
- Cold-filtered water (1.25 liters for the KBT model)
- Coffee beans
- A coffee grinder (I strongly recommend a burr grinder but a blade grinder can work too)
- A spoon or other stirring tool
- Filter papers (As I said before, I recommend using Moccamaster’s own filters)
- Weighing scale (optional)
The Steps:
Step 1: Fill the Water Reservoir
To start, you’ll need to fill the water reservoir with cold water. Not hot water, not warm water, but cold water.
The reason for this is that the coffee brewing machine has a copper heating element that will bring the water to the perfect brewing temperature (196-205 degrees Fahrenheit).
The amount of water you’ll need will depend on the model you have. For the KBT model, you’ll need 1.25 liters of water to fill the reservoir.
Step 2: Insert the Filter Paper
Once you’ve added the correct amount of water to the reservoir, it’s time to insert the filter paper into the brew basket.
To ensure the filter paper fits properly, fold the longer sides first and then the shorter ones.
Step 3: Rinse the Filter Paper
Once the filter paper is inserted, rinse it with warm water from the Moccamaster.
This will help to remove any impurities from the paper and it will also help to preheat the brew basket.
Step 4: Grind the Coffee Beans
Now it’s time to grind the coffee beans. You’ll need about 60 grams of coffee beans for a full carafe (10 cups).
If you don’t have a coffee grinder, you can use pre-ground coffee. However, I recommend grinding your own beans because it will taste fresher and better.
To get the best results, use a burr grinder. But if you don’t have one, a blade grinder will work too.
Grind the coffee beans to the medium-coarse grind size. I like to compare it to sea salt.
Step 5: Add the Coffee Grounds to the Brew Basket
Once the coffee is ground, it’s time to add it to the brew basket.
If you’re using a scale, add 60 grams of coffee to the brew basket. If you’re not using a scale, add about 7 level tablespoons of coffee.
After adding the coffee, gently shake the brew basket to level out the coffee grounds. This will ensure that the water can flow evenly through the coffee.
Step 6: Place the Brew Basket Back into the Moccamaster
Place the brew basket back into the coffee maker and make sure it’s firmly in place. To do this, hold the brew basket with one hand and the coffee maker with the other.
Then, switch the brew basket to the “X” position.
Step 7: Position the Carafe
Once the brew basket is in place, put the carafe under the brew basket. Make sure that the spout is positioned over the carafe so that the coffee can flow evenly into it.
Step 8: Turn on the Coffee Maker
Flip the switch on the coffee maker to the “on” position.
The red light will turn on, indicating that the coffee machine is on.
Hot water will start flowing from the water reservoir and into the brew basket via the metal wand.
Read here on how to get your Moccamaster coffee ratios correct.
Step 9: Stir and Bloom the Coffee
Once the filter basket is half full, gently stir the coffee grounds with a spoon.
Stirring the coffee will help to bloom the grounds and release the gases.
Coffee blooming is when the coffee grounds expand and release carbon dioxide gas.
This gas needs to be released in order for the coffee to taste its best.
After stirring, let the coffee bloom for 30 seconds then open the valve and switch the filter basket to the “O” position.
Doing this will allow the coffee to drain into the carafe.
Caution: Since hot water will still be flowing into the filter basket, do not remove the filter basket from the coffee machine.
Just gently stir the coffee and then let the brewing process continue.
Step 10: Let the Coffee Brew
Close the filter basket lid and let the rest of the coffee brew. The entire brewing process should take about 5-6 minutes.
You’ll know the coffee is done brewing when the red light turns off.
Step 11: Pour and Enjoy!
Once the coffee is done brewing, pour it into your favorite mug and let your taste buds enjoy the fresh coffee!
If you want, you can add milk, sugar, or any other type of coffee creamer. I like to keep my coffee black and enjoy the bold flavor.
Caring for Your Moccamaster
To keep your Moccamaster in tip-top shape, it’s important to clean it on a regular basis. I like to clean mine after every use.
To clean the machine, remove the water reservoir and brew basket and wash them with warm, soapy water.
Rinse the parts well and let them air dry. Do not put the parts in the dishwasher.
You can also descale the coffee maker every 3 – 6 months. This will help to remove any minerals that can build up over time.
To descale the machine, follow the instructions in the user manual.
Final Thoughts
That’s it! You now know how to use a Moccamaster coffee machine. By following these simple steps, you’ll be able to brew delicious filter coffee in large batches.
So, go ahead and enjoy a cup of freshly brewed coffee!
FAQs
What Is So Special About Moccamaster?
For starters, the Moccamaster brewing process results in a great-tasting coffee. The water is heated to the optimal temperature for brewing (between 196-205 degrees Fahrenheit) and then evenly distributed over the coffee grounds. This results in a more uniform extraction, which means that all of the coffee’s flavors are extracted evenly.
Can I Use Pre-Ground Coffee in Moccamaster?
Yes, you can use pre-ground coffee. However, it’s best to use freshly ground coffee for the best flavor.
How Much Coffee Do You Put in a Moccamaster?
Moccamaster suggests using 60 grams of coffee for a 1.25-liter carafe. This ratio results in a strong coffee. If you prefer a weaker coffee, you can use less coffee.

